


Want to know how to make Gamepass in Roblox Pls Donate? This guide will help you. This will allow you to accept donations in the game, and in order to receive them you must set a price and make sure you can “sell”it. These are all the steps you need to follow.
How to make Gamepass in Roblox Pls Donate
Here’s how to get a gamepass on PC:
- Launch Roblox.
- Click “Create”in the top menu.
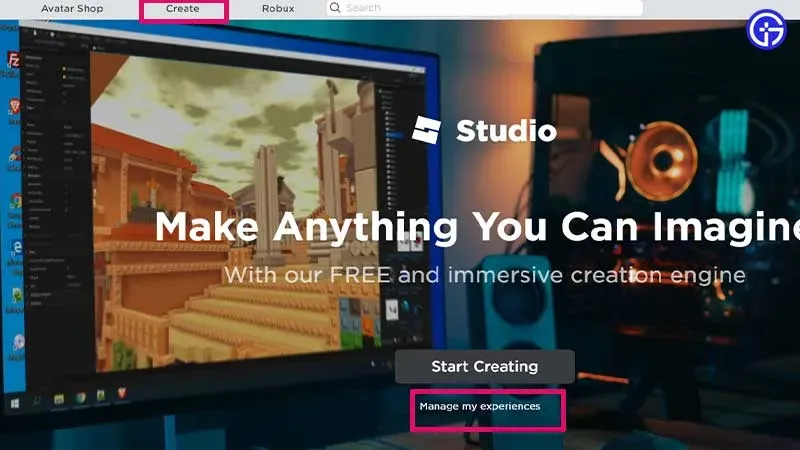
- Click “Manage My Experience”which is right below the “Start Building”button.
- Now under “My Creations”you will see the creation that Roblox studio gives you by default. If there’s nothing there, click “Create New Experience”to create one. But if it’s already there, you need to follow the next step.
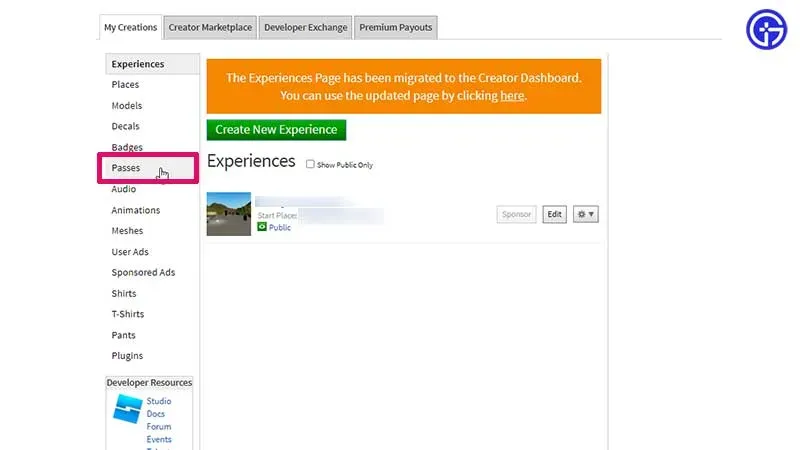
- On the menu on the left, click Passes.
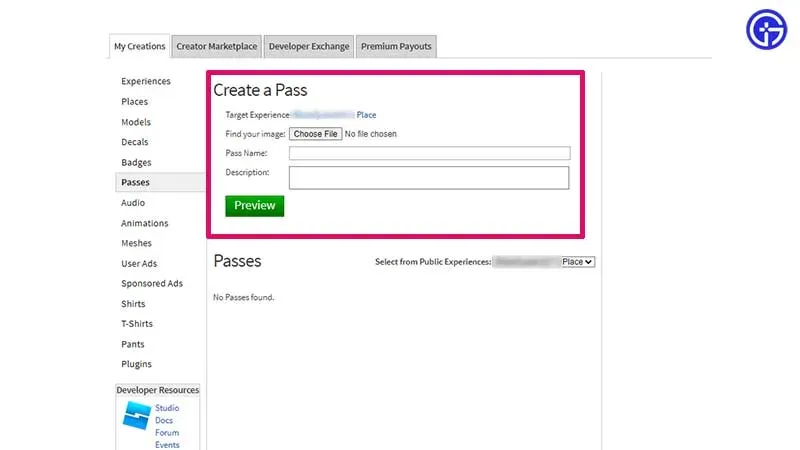
- In the Create Pass section, click Browse to upload an image. It can be any image on your computer. Give the pass a name and description.
- Click Preview and Verify Download. You should see the message Pass Successful Created.
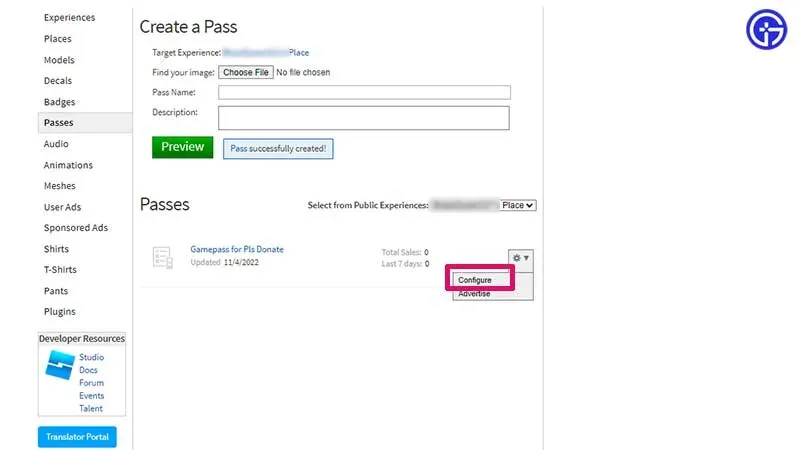
- Click on the gear icon in the lower right corner and click “Settings”.
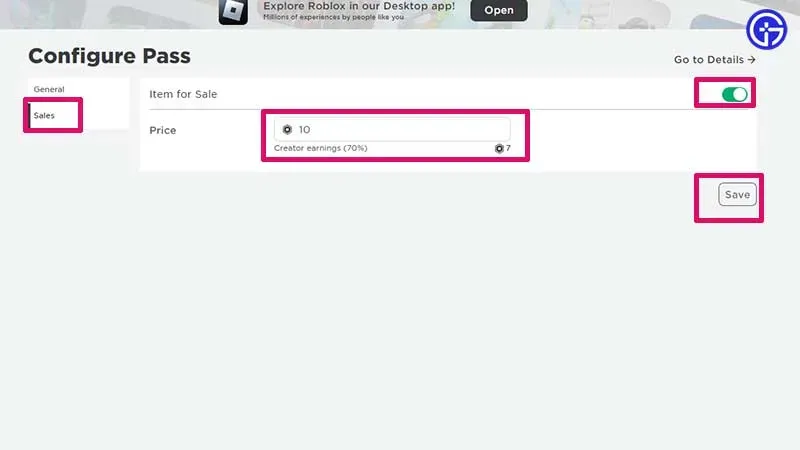
- In the Customize Pass section, click Sell. Enable the “Product for sale”button, set the price and click “Save”.
How to add Gamepass to your booth
Now that you have a game pass, it will not directly reflect in the game.
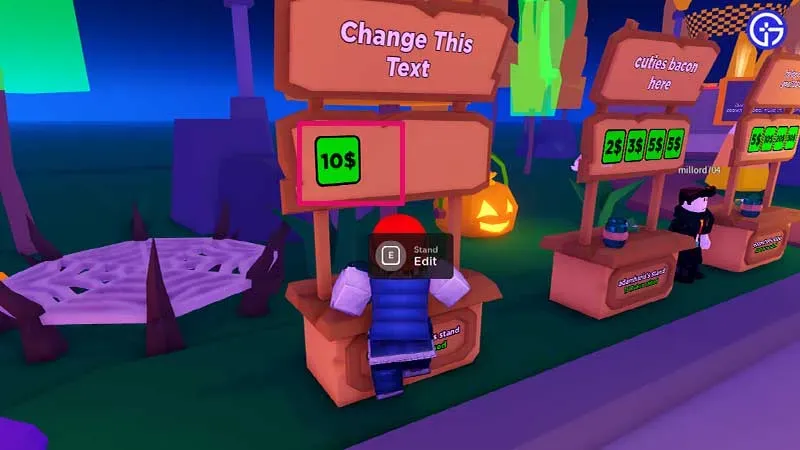
- If you haven’t claimed a Stand yet, all you have to do is walk up to an unclaimed Stand and interact with it to claim it.
- Or, if you’ve already claimed a booth, interact with it and click the Refresh icon in the pop-up window. This will make the gamepass appear on the booth.
- Hover over the price and you’ll see a game pass with the name you just added.
- You are now ready to receive donations from other Roblox players.
That’s all it takes to create a gamepass in Pls Donate. If you want to make your stand even more interesting, you can change the font color and style. Check out the guide to find out more.