
The Nest thermostat has delayed a reliable temperature control option in your home. This device helps to monitor energy consumption and maintain a comfortable temperature in the living room.
Are you worried that your Nest thermostat is being delayed? Identifying and understanding a problem with a Nest thermostat can be difficult, and fixing it can be a nightmare.
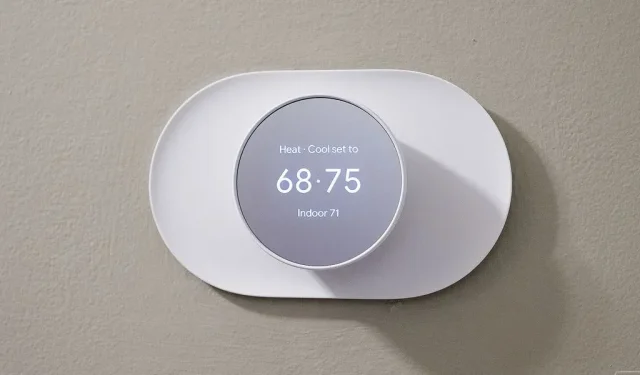
A snooze notification is displayed on the nest thermostat screen.
Nest Thermostat customers often encounter this problem and often ask about it. You can find out the answer by reading the article in full.
We will explain what it means and how you can solve this problem without problems.
Why is my Nest thermostat reporting a delay?
There are several reasons for the thermostat to linger in the socket, which are listed below:
- Your Nest thermostat was recently installed
- Battery life issues
- You recently rebooted your system
- Wiring circuit is faulty
Your Nest thermostat was recently installed
When you install a new Nest thermostat in your home or office, its temperature sensors will take some time to adjust to the new conditions.
That’s why the “Delayed”message appears. Also, you can’t predict how long it will take to tune in before it can perform optimally.
Thus, it takes some time to complete its actions and you don’t have to worry about it. The Nest thermostat automatically adjusts to the surroundings of your home or workplace when given enough time.
Nest thermostat battery problems
Another reason why your Nest thermostat displays delayed messages is due to battery drain.
The Nest thermostat takes some time to start if the internal battery is not enough to power it.
In addition, the thermostat has a lithium-ion battery that is powered by the HVAC system. The HVAC system and battery will not work if the battery is low.
You recently rebooted your system
After the system has rebooted, a delay message will appear on the nest thermostat.
Rebooting your Nest will erase all saved data, so it will have to re-learn your home as if it were brand new.
Eventually, the delayed message will disappear as the system collects data about the area around it.
Wiring circuit is faulty.
Nest thermostats are powered by HVAC (heating, ventilation and air conditioning). You must ensure that your Nest thermostat is properly connected between the HVAC and Nest. In the event of a wiring problem, Nest will notify you with a delay.
If you go to the Nest thermostat settings you can see where the wiring is.
How to check the wire in the Nest thermostat?
To test your Nest thermostat wires, follow these steps:
- Open the settings option and click on it.
- Scroll it until the “Hardware”option appears on the socket. Now click on it.
- Now you will see the following wires: Y1 (yellow wire) for cooling, W1 (white wire) for heating, G (green wire) for fan, RH (red wire) for power, and C (blue wire) for ground. the wire.
- When the display shows no C wire, you must connect the missing C wire (blue) to make it work.
How to fix Nest thermostat delay?
The Nest thermostat may receive a “Delay”notification if it contains a power issue. Unlike some older thermostats, the Nest thermostat contains rechargeable lithium-ion batteries that cannot be removed.
The Nest cannot receive enough power due to wiring problems or a missing C wire.
The most common Nest thermostat delay fixes are:
- Check if the Nest thermostat is new
- Make sure the battery is charged.
- Update your software
- Check if the AC wire is connected
Let’s start by checking if the thermostat is new.
Check if the Nest thermostat is new
As discussed above, newly installed Nest thermostats can take time to optimize the heating and cooling of your home.
When your device displays “2 Hour Delay”or other timeline, wait for a while and then it will resume its normal functions.
Similarly, if you recently rebooted Nest, Nest will send you a delay notification.
All information about your home has been removed from the device. As a result, you will have to wait a couple of days for it to get back on track.
Make sure the battery is charged.
You can manually charge the battery using the USB cable if the Nest thermostat’s battery is dead and the HVAC system is not producing enough power.
To do this, follow these steps:
- On the wall, remove the front cover to reveal the micro-USB port.
- Connect your device to a compatible charger and let the internal battery charge for a while.
- Once it has been left on for a while, simply replace the front of the socket and you should no longer see the Delayed message.
Even though this is an immediate fix, it won’t fix the “Lag”issue permanently. Due to the lack of power provided by the HVAC system, the battery will need to be recharged regularly.
Update your software
All modern gadgets, including Nest thermostats, work better with frequent software updates.
It is possible that the update is interfering with the normal operation of your device if it displays a “Delay”notification.
It’s normal to get “Delay”alerts, so just wait for it to finish updating and it will start working again without crashing.
Check if the AC wire is connected
The Nest thermostat is powered by 24VAC DC through the C or “common”wire.
Therefore, it is mandatory to connect common wires to the thermostat; otherwise Nest thermostats will be delayed.
In addition to the R wires, the C wire connects the smart thermostat to the HVAC system. This is what allows the Nest thermostat to work 24 hours a day.
How to install wire C
The C-wire of the Nest thermostat can be installed in the following ways:
- Connect wire C to the thermostat terminal in the HVAC system.
- Replace wire C with fan wire (G).
- A C-wire adapter must be installed.
Note. Installing the C-wire is difficult, so it is recommended that you hire a professional to do the job.
Connect the C wire to the thermostat terminal in the HVAC system by yourself.
This is an economical option if you know how to wire and install it yourself. If not, we recommend contacting a professional to perform the work described below.
Also, the proximity of your socket to your HVAC system will affect how difficult this is.
Wiring all over your home can be intimidating if your HVAC is upstairs and your thermostat is downstairs.
If you choose to install the new C-wire yourself, follow these basic steps:
1st method: define the wiring route
Start by determining the route the wire must take to get to the Nest thermostat from the HVAC system.
You may just need to drill one hole in the wall. Otherwise, you will need to chart a route that is slightly longer within your home.
2nd Method: Connect wire C to the Nest thermostat.
- The wire must be pulled into the thermostat and hooked onto the appropriate terminal.
- Make sure the wire is not tangled or twisted.
- It will need to be threaded through the unit and the other end through the walls to the HVAC system.
- Pass the wire through hard-to-reach places with a wire rod.
3rd Method: Connect the C wire to the HVAC system.
After pulling on the wire and reaching the HVAC equipment, connect the wire to the appropriate terminal to complete the circuit.
- Remove the cover and turn off the HVAC system or press the switch to turn it off.
- Determine thermostat terminals W, R, G, Y and C.
- Connect wire C of the extended socket thermostat to terminal C of the HVAC board.
- Turn on the HVAC system and attach the front cover.
- The Nest Thermostat needs to be configured according to its settings.
- Finally, go back to the Nest Thermostat and look at the C wire connected in your device’s Hardware menu to make sure the C wire is installed and connected correctly.
When you connect wire C to the Nest thermostat, it receives constant power from the HVAC system. So it no longer shows the “Delay”notification.
Install the C wire adapter:
You don’t need a professional to install the C wire adapter. You can follow the installation process yourself:
- Remove the front of the Nest thermostat to access the wiring terminals.
- There are two wires connected to the adapter. Connect one cable to the power connector (RH) and the other cable to the Common connector (C).
- Now plug the adapter plug into the nearest wall outlet.
Replace wire C with fan wire (G).
There is a green wire called the G wire that controls the fan. By using it, you can trick the thermostat into thinking that the C wire is installed.
Here’s how to do it:
- First, turn off the HVAC system and remove the thermostat front panel.
- Then connect the G wire to the C terminal by removing it from the G terminal.
- Now go back to the HVAC system terminals and repeat the process.
- After turning on the system, return to the Nest thermostat settings menu and continue with the setup.
Note. This solution will limit your ability to independently control the fan for heating or cooling.
Conclusion
Nest Thermostat is an ingenious device that minimizes energy consumption and maintains a comfortable temperature in your home.
You should not be concerned if you receive a nest thermostat delay message. There can be various reasons, such as if it was recently installed, if it was rebooted, or there was a problem with the C wire.
We’ve covered almost every fix if any of these issues occur. Usually no fixes are required and you must leave your nest to learn about your surroundings. Fortunately, you rarely need to close the circuit unless the C-wire is connected to the Nest thermostat.
FAQ
Why is the Nest thermostat slow?
The Nest thermostat shows “delayed,”which means your home’s cooling is delayed. There are several reasons for this; however, common causes are C-Wire and an underpowered thermostat.
What does the red blinking light on the Nest thermostat mean?
A blinking light (red) indicates the Nest’s battery is low. When the battery is recharged, the device should automatically restart. By connecting the USB port of your device to the thermostat display, you can also speed up the process.
What are the lights and sounds in the nest?
The Nest Protect makes a sound when you turn it on. Your Google Nest Protect talks to you automatically, so you don’t have to guess what it’s talking about. A notification will also appear on your smartphone or tablet if your Protect is connected to a Wi-Fi network. The Nest app store notifies about the message folder.
How do I change my Nest home/away settings?
Here are the steps to change which Nest products report activity sensor data. Launch the Nest app. Go to “Settings”. Click Help Home/Away. Help at home/away.