
Several users switched to Google Docs as Microsoft Word became more cluttered with activation-related information. Google Documents did, however, have some peculiarities, much like any other online program. Although Google Docs made everything reasonably simple to perform, a lot of formatting information was nowhere to be found. Using Hanging Indent in Google Documents is one of those things.
Many people have heard of Hanging Indent in Google Docs but are unsure on how to use it. You are in fortunate if you fall into that category. This post will demonstrate how to use hanging indents in Google Documents.
A Hanging Indent is what?
If you frequently use Google Documents, you may already be accustomed to indentation. Nonetheless, you probably already understand the value of mentioning some work if you are a research applicant or someone who completes citation works. The hanging indentation is utilized in that specific item.
When the initial line of a paragraph begins at the leftmost margin, the paragraph is said to have a hanging indent. The other lines, however, are right-indented.
The readers are made aware of every piece of information so they may rapidly grasp it with this kind of information. Nowadays, reference lists, research papers, and bibliographies are the main contexts in which hanging indentation is used. There are countless other possible uses as well.
2023 Google Documents Hanging Indent Instructions
Here, we’ll demonstrate how to use Google Documents’ Hanging Indent feature. This guide has been divided into several steps for your convenience. Be sure you read this in order.
Step 1: Launch your Google Documents file.

You must first open the Google Documents document in which you want to use a hanging indent. Even if you already know how to open it, go to docs.google.com and select Blank to start a new document if you have any questions. You can alternatively locate and open the old document where the dangling indent is desired.
Step 2: Decide which paragraphs to format.

You must now choose the paragraph that you want to format with a hanging indent once you are within your document. Simply click and drag your mouse over the text to accomplish this.
Pressing Shift and the right arrow key to the location you wish to choose is a great alternative. Make sure not to choose every option.
Step 3: Hanging indent format
You just need to follow a few easy procedures to finish your task now that your paragraph has been chosen for hanging indent. Be sure your cursor doesn’t move to another location before you click; otherwise, the text will no longer be highlighted. Now take these actions:
- To format, select Format in the top menu bar.
- Choose Indent and Alight.
- Choose Indentation Options from the menu that appears on the right.

- Click on the box under the Special Indent now.
- From the list, choose Hanging.
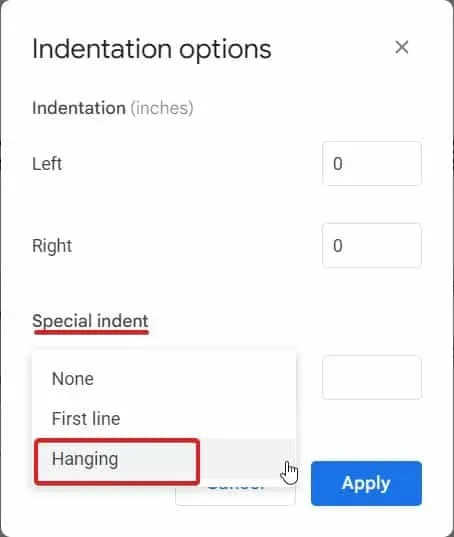
- The standard distance is 0.5″. It can be changed to suit your preferences.
- Choose Apply.

Your paragraph will be hanging indented as soon as you click Apply to save the modifications.
Final Verdict
That is all there is to say about dangling indents in Google Documents at this time. This manual should have been useful to you. A dangling indent may now be easily and rapidly created in Google Documents. You can style your text so that readers can rapidly skim through lists with a few easy clicks. Please leave a comment below if you still have any questions or concerns, and we will assist you.