In this tutorial, we will show you how to take control of someone else’s Mac while they are sharing their screen with you.

Imagine your parents or siblings living in another city needing help doing something on their computer. In this situation, you can ask them to share their Mac’s screen with you or just send them a request to share their screen with you. Once screen sharing is established, you can:
- Point to specific menus, buttons, and areas on their Mac,
- Take entire control of their Mac and make changes on it.
- This works when both users have a Mac.
- The image quality and responsiveness of controls will depend on the internet speeds on both ends.
- Both sides get to see what’s happening on the computer. For example, if you’re controlling someone’s Mac and open a folder on their computer, they will see that folder opening on their side.
- The person who is sharing their screen can stop sharing anytime they want.
How to see and control another person’s Mac remotely
You can do this using one of the three Apple apps that are built-in on every Mac: Messages, FaceTime, Screen Sharing. The fundamentals are the same, but the initial steps are different.
1. Using the Messages app
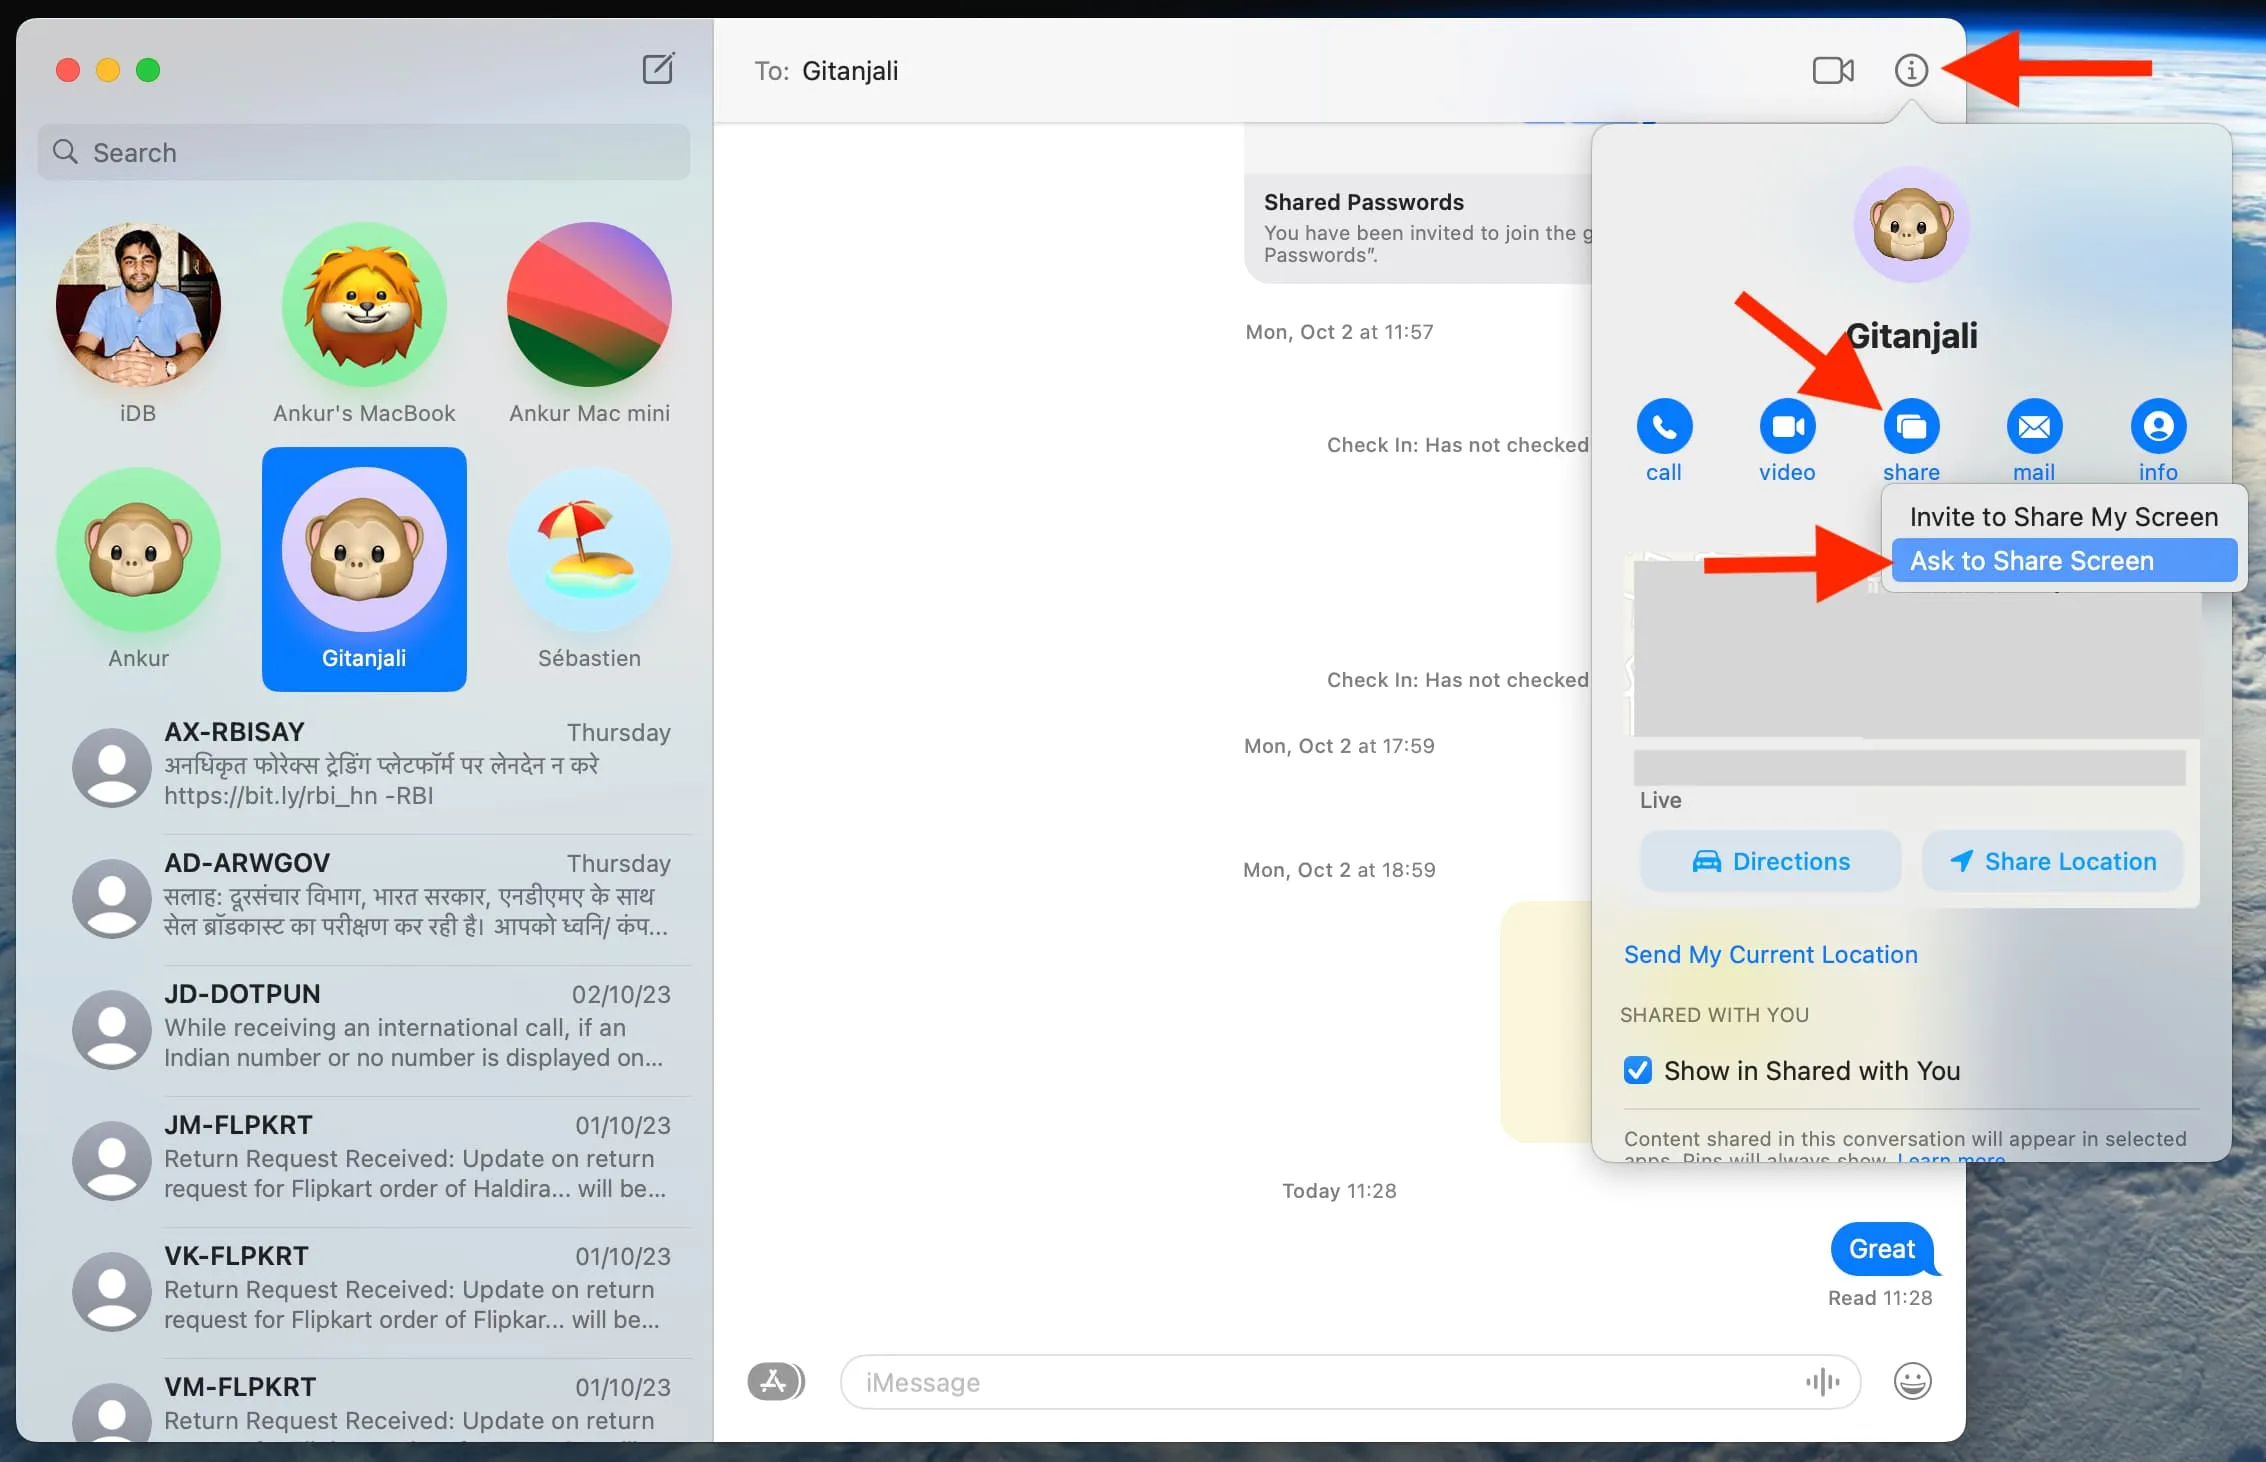
1) Open the Messages app and go inside the person’s conversation.
2) Click the info button ⓘ next to their name.
3) Click share and choose Ask to Share Screen or Invite to Share My Screen. Since you’re the one helping, use the Ask to Share Screen option.
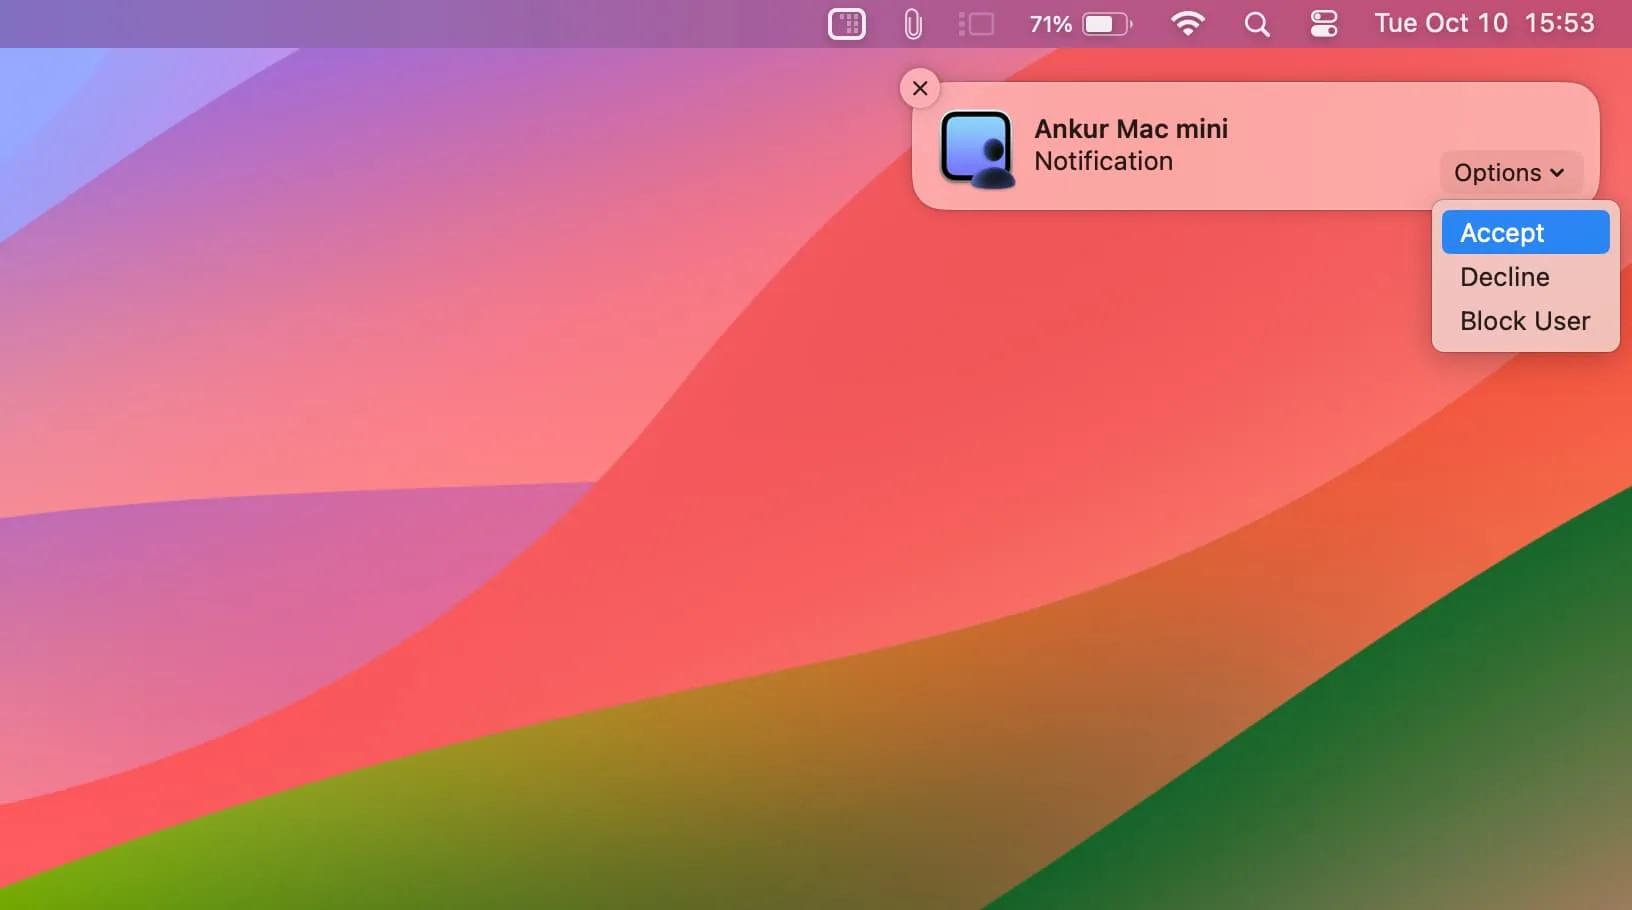
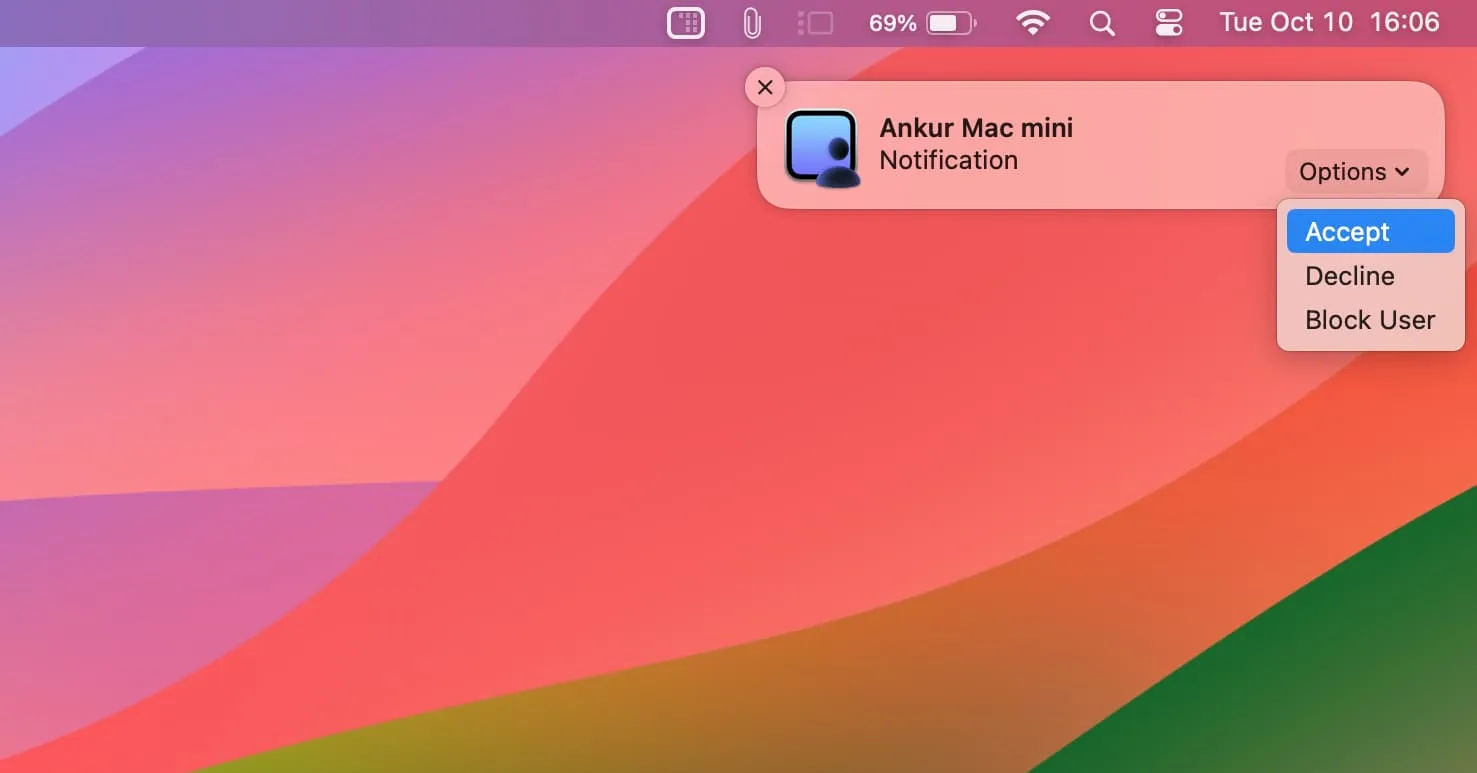
4) Now, the other person will receive a notification on their Mac saying you requested them to share their screen. The person should click Options > Accept on that notification.
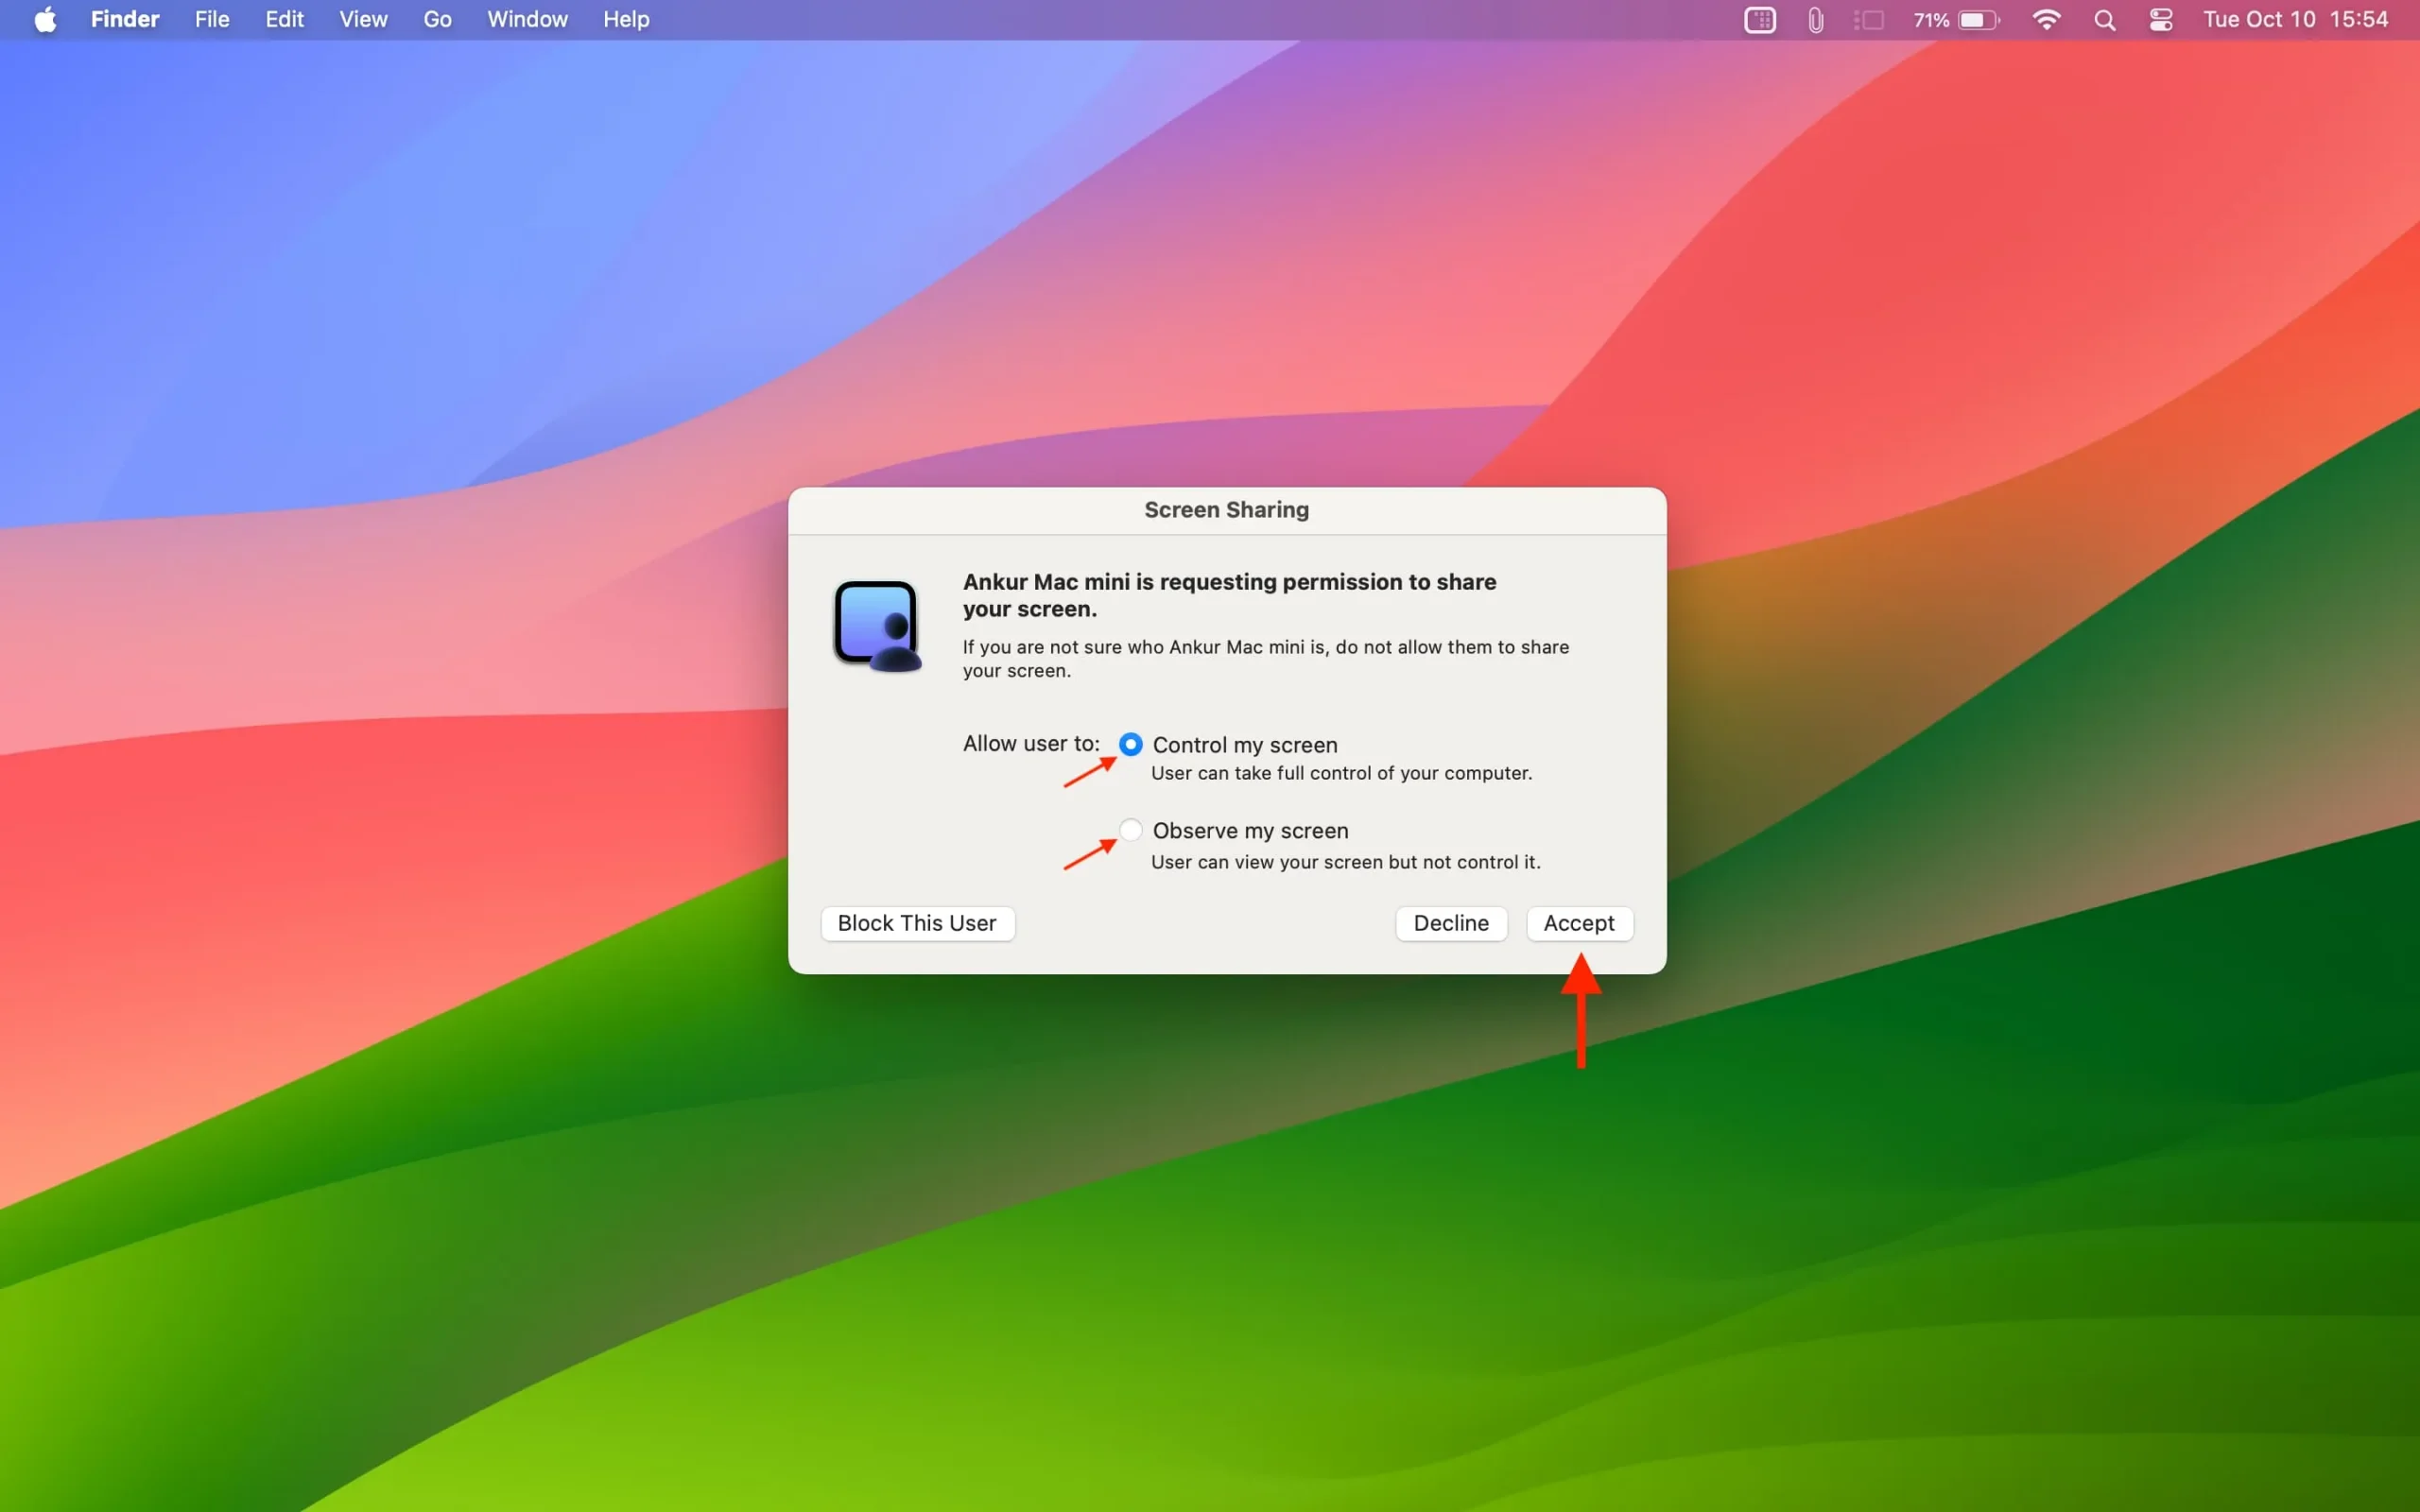
5) Next, they will see a menu window with two options. Ask them to select one and click Accept:
- Control my screen: This will give full control and allow the other side to do things on the Mac remotely.
- Observe my screen: Use this to only let the other person remotely view the screen and point/highlight items and menus. They can’t actually open folders, menus, etc., remotely when this option is used.
6) After the person accepts your screen sharing request, you will see their screen on your Mac.
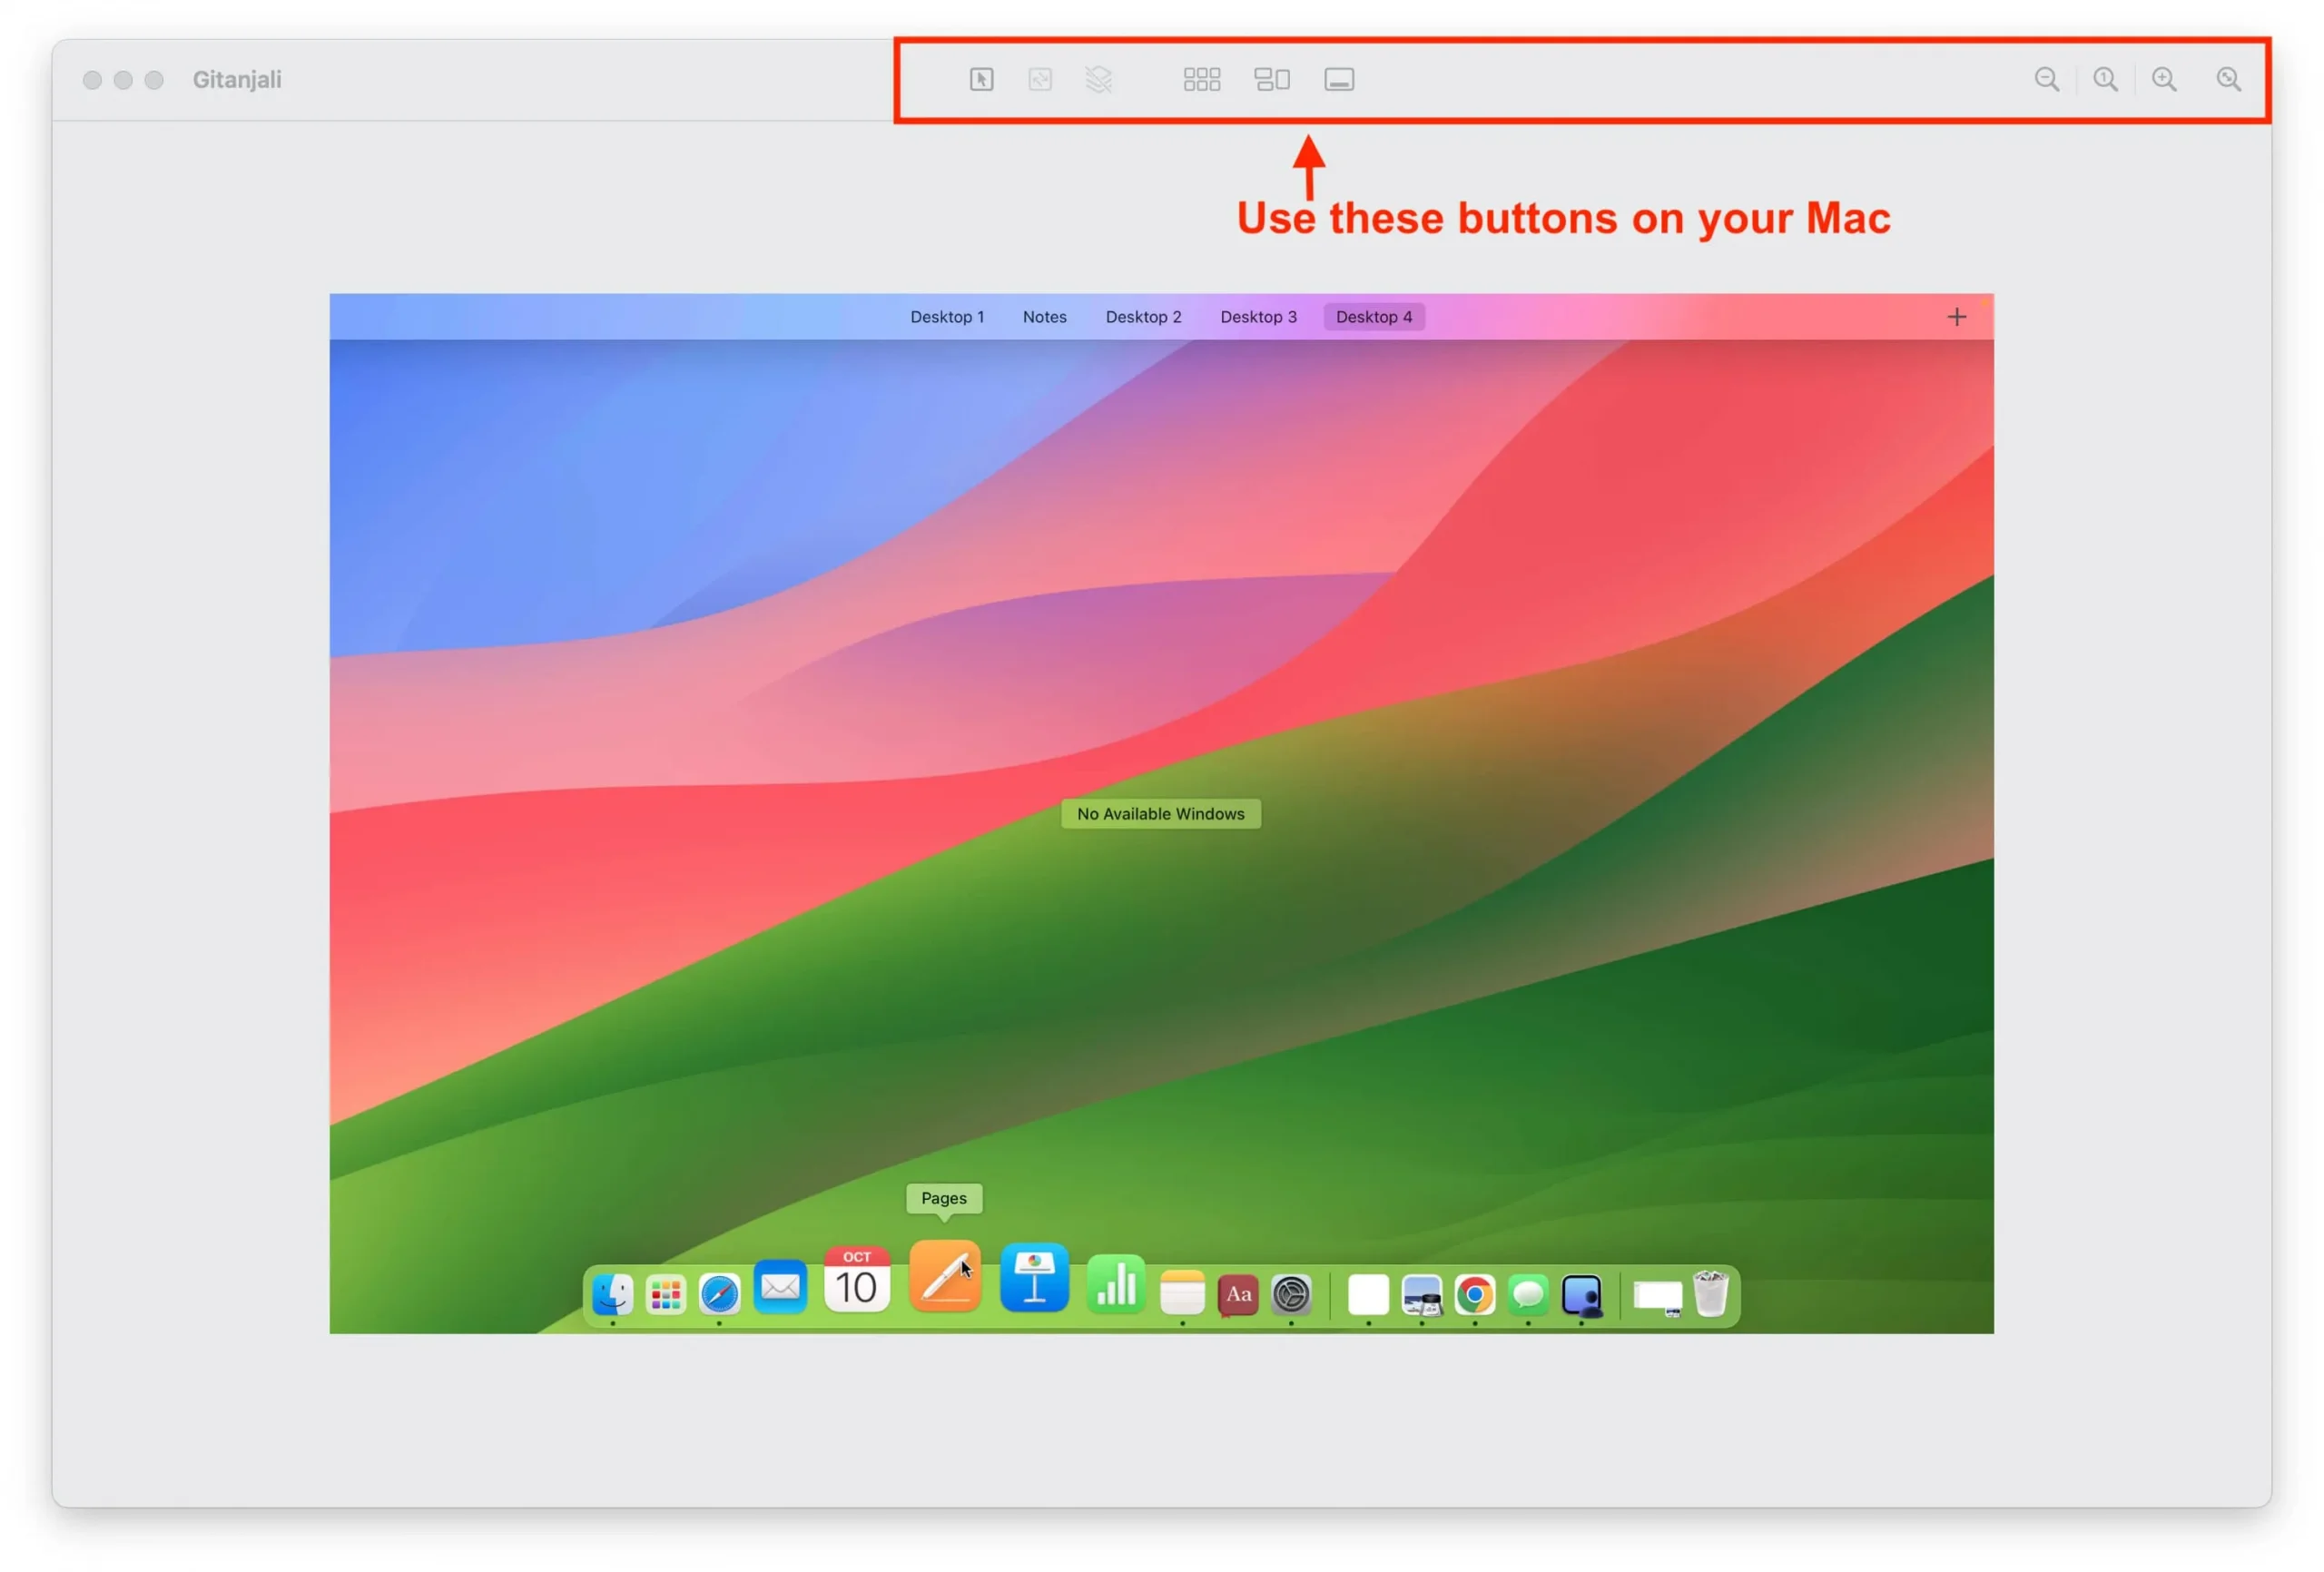
If they had selected “Control my screen,” you can open apps, go inside Finder folders, and control their computer with your mouse, trackpad, and keyboard. You can use the button on the top of the screen sharing window on your Mac to adjust the screen visibility or open Launchpad, enter Mission Control, show desktop, and more on the remote Mac. You can even take screenshots on that remote computer from your keyboard!
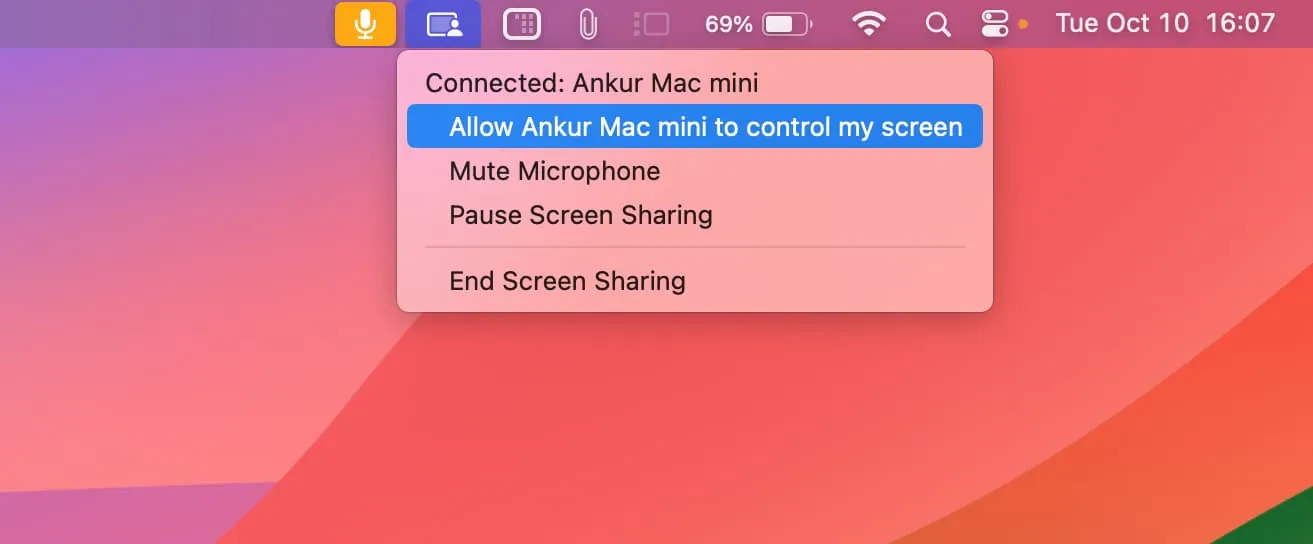
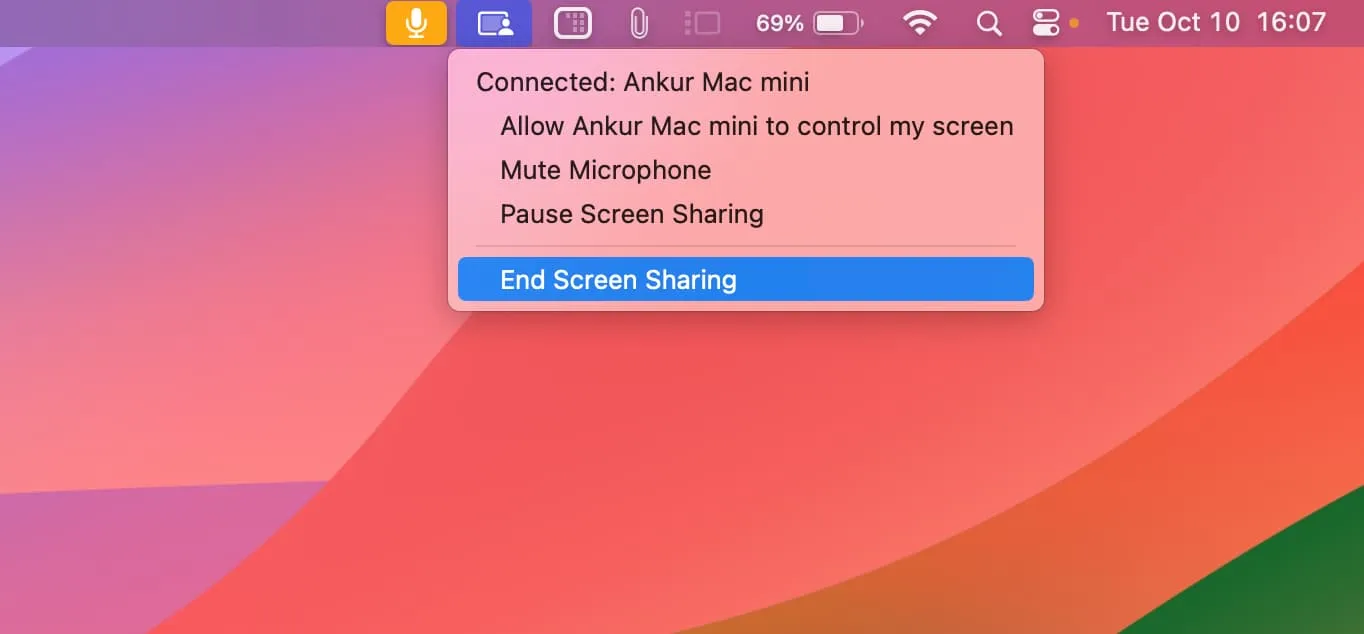
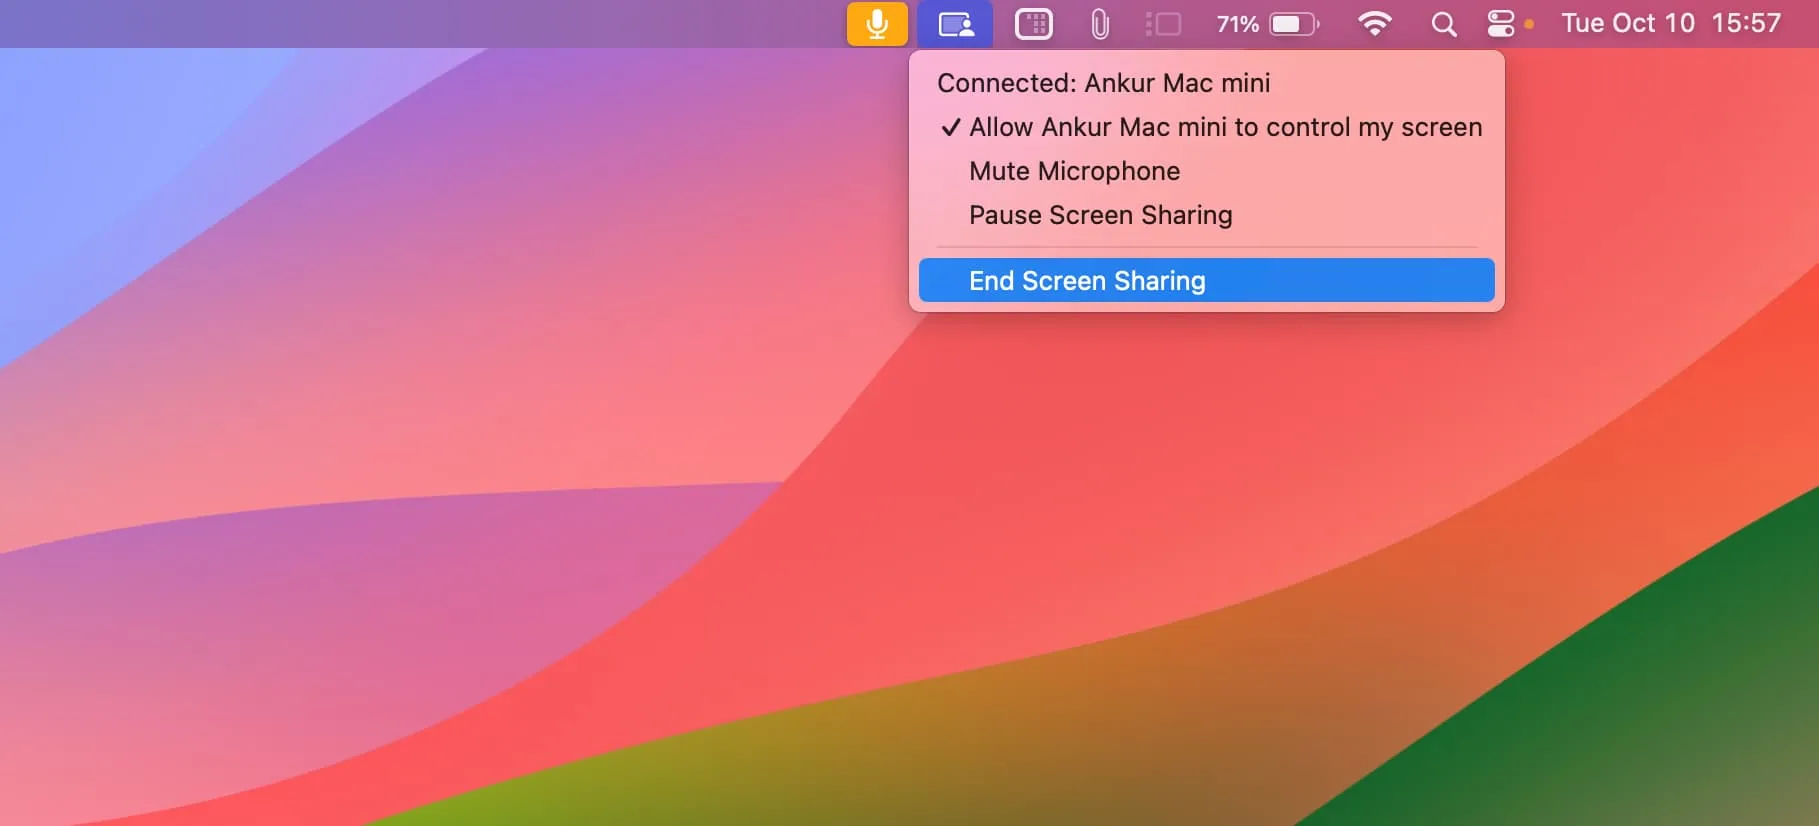
Pause or end screen sharing: When the screen sharing is going on, click the screen sharing button from the top menu bar on your Mac (the person who is sharing their screen) and choose Pause Screen Sharing or End Screen Sharing.
2. Use FaceTime
Both Macs must be on macOS Sonoma or later for this to work.
1) Make sure you’re on a one-on-one FaceTime video call.
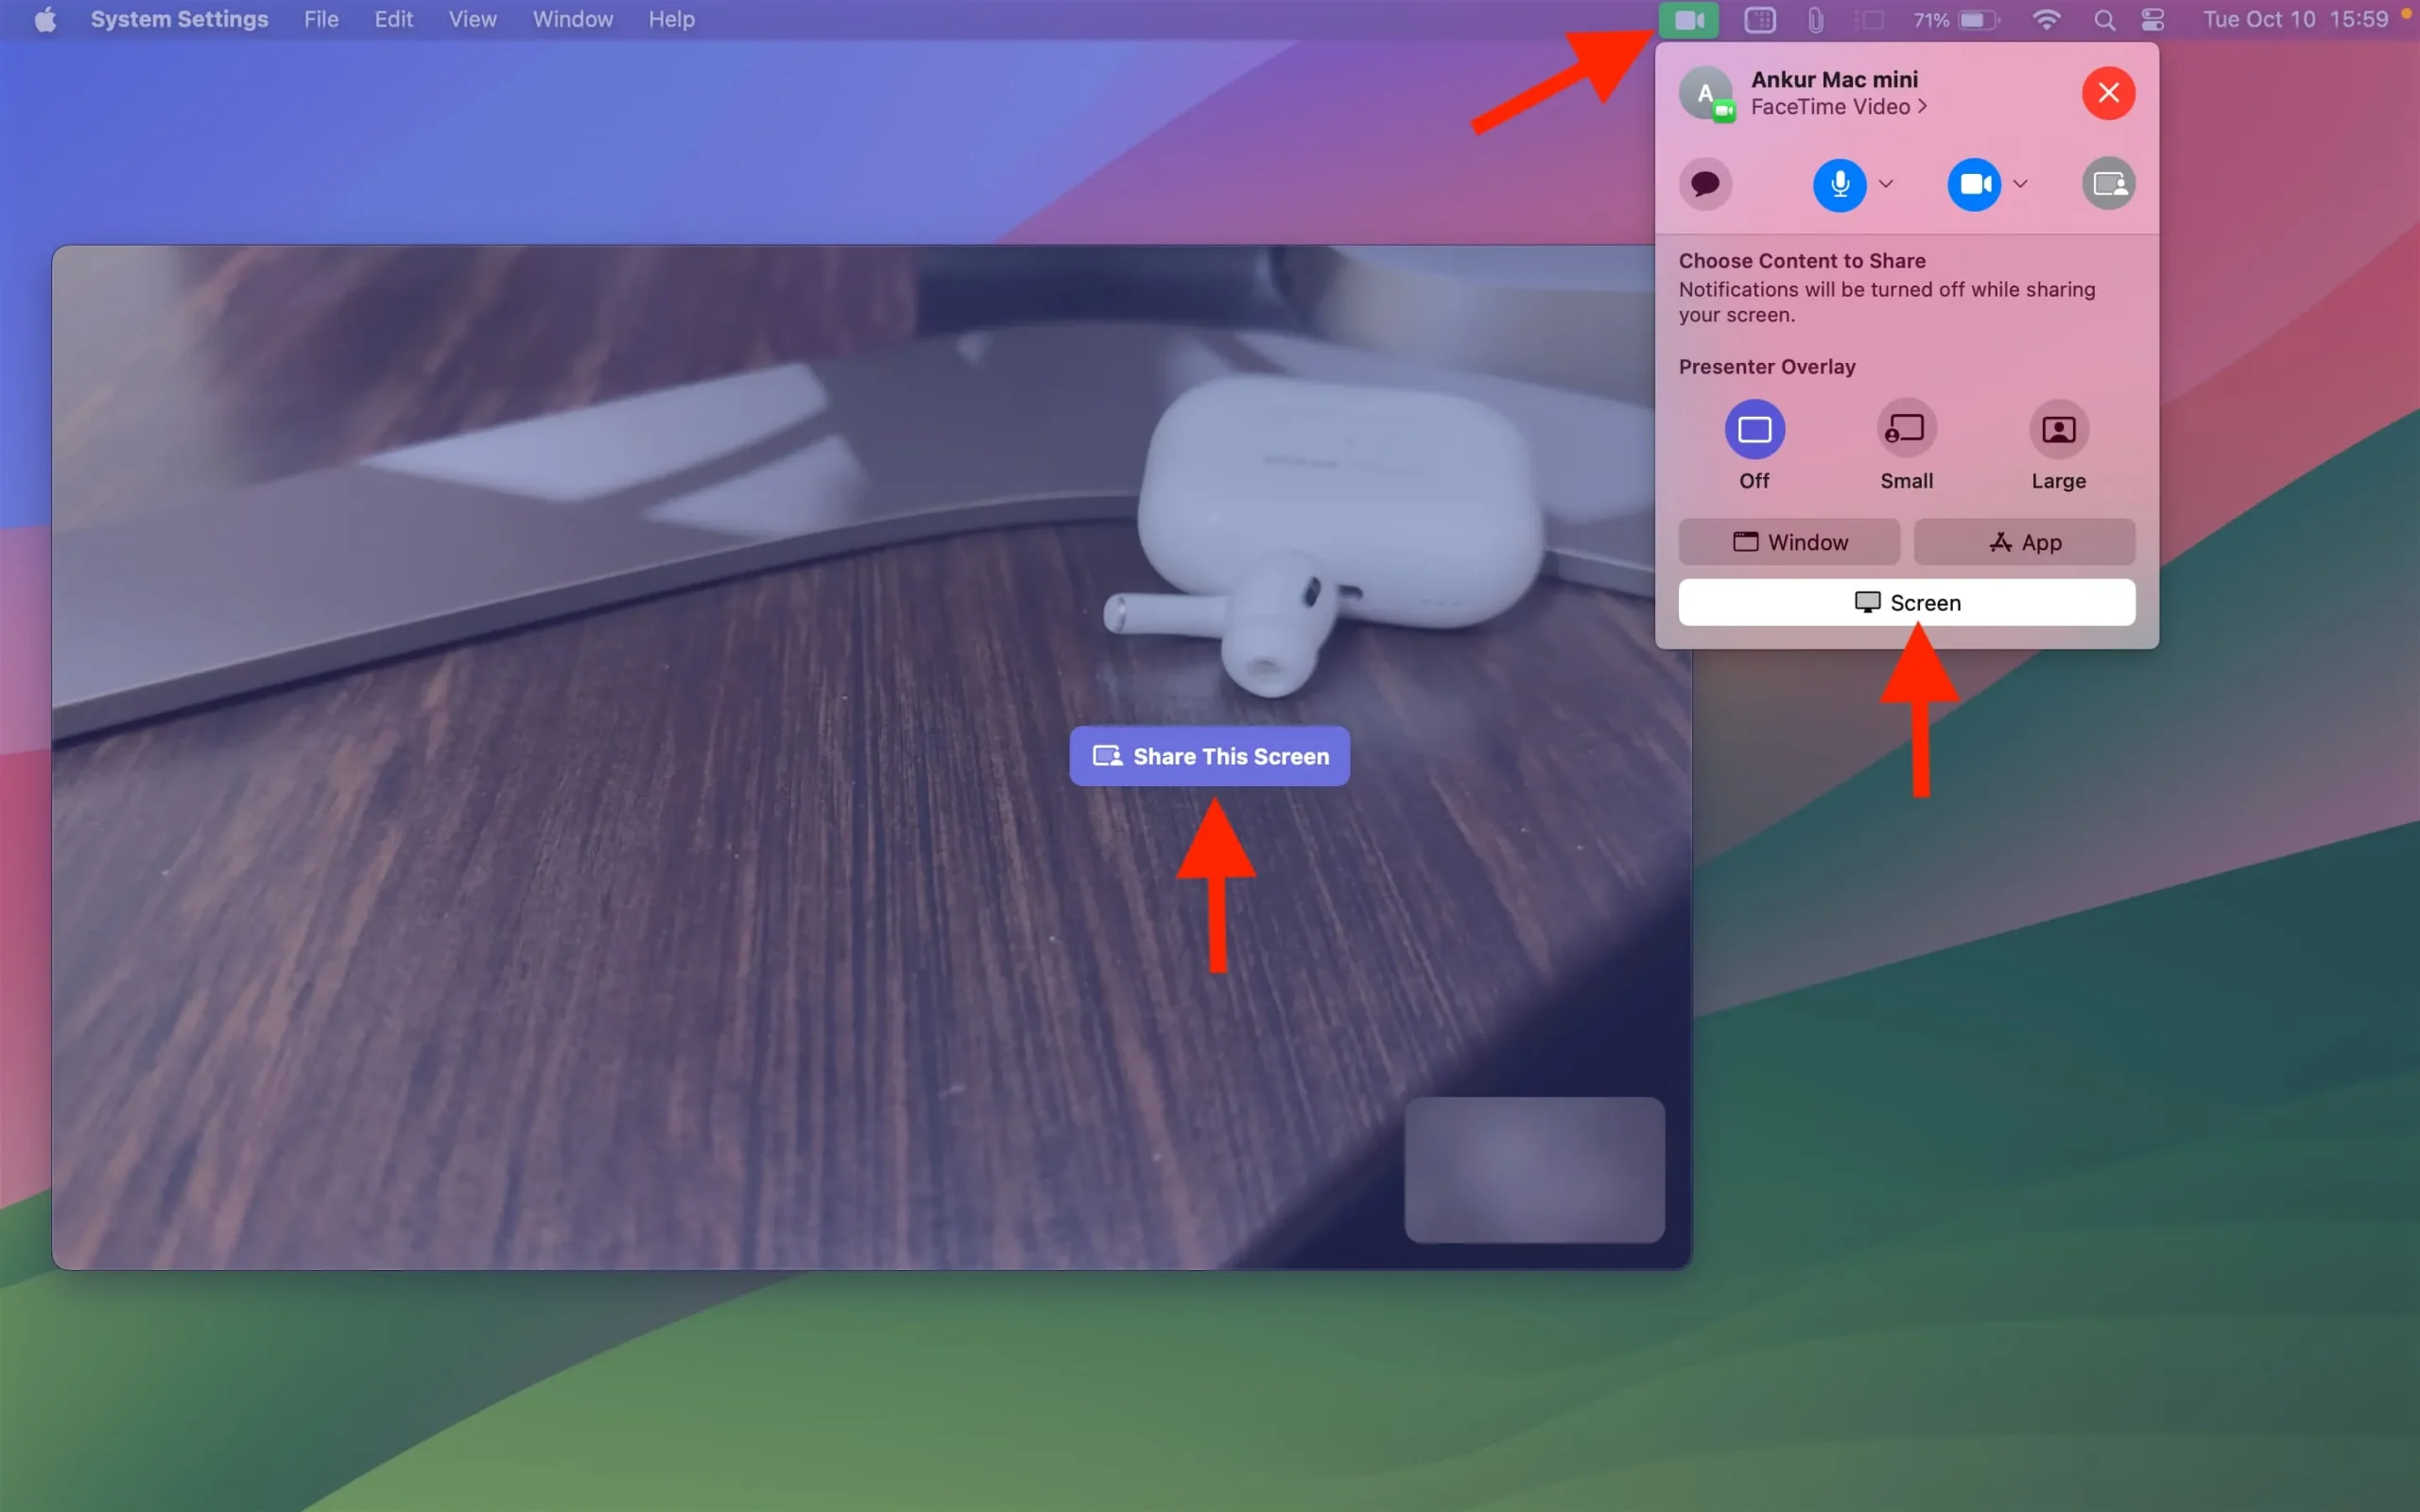
2) The person who needs help should share their screen. To do that, they should click the Share Screen button on the FaceTime window.
3) Now, they should select Screen to show their entire screen and click Share This Screen.
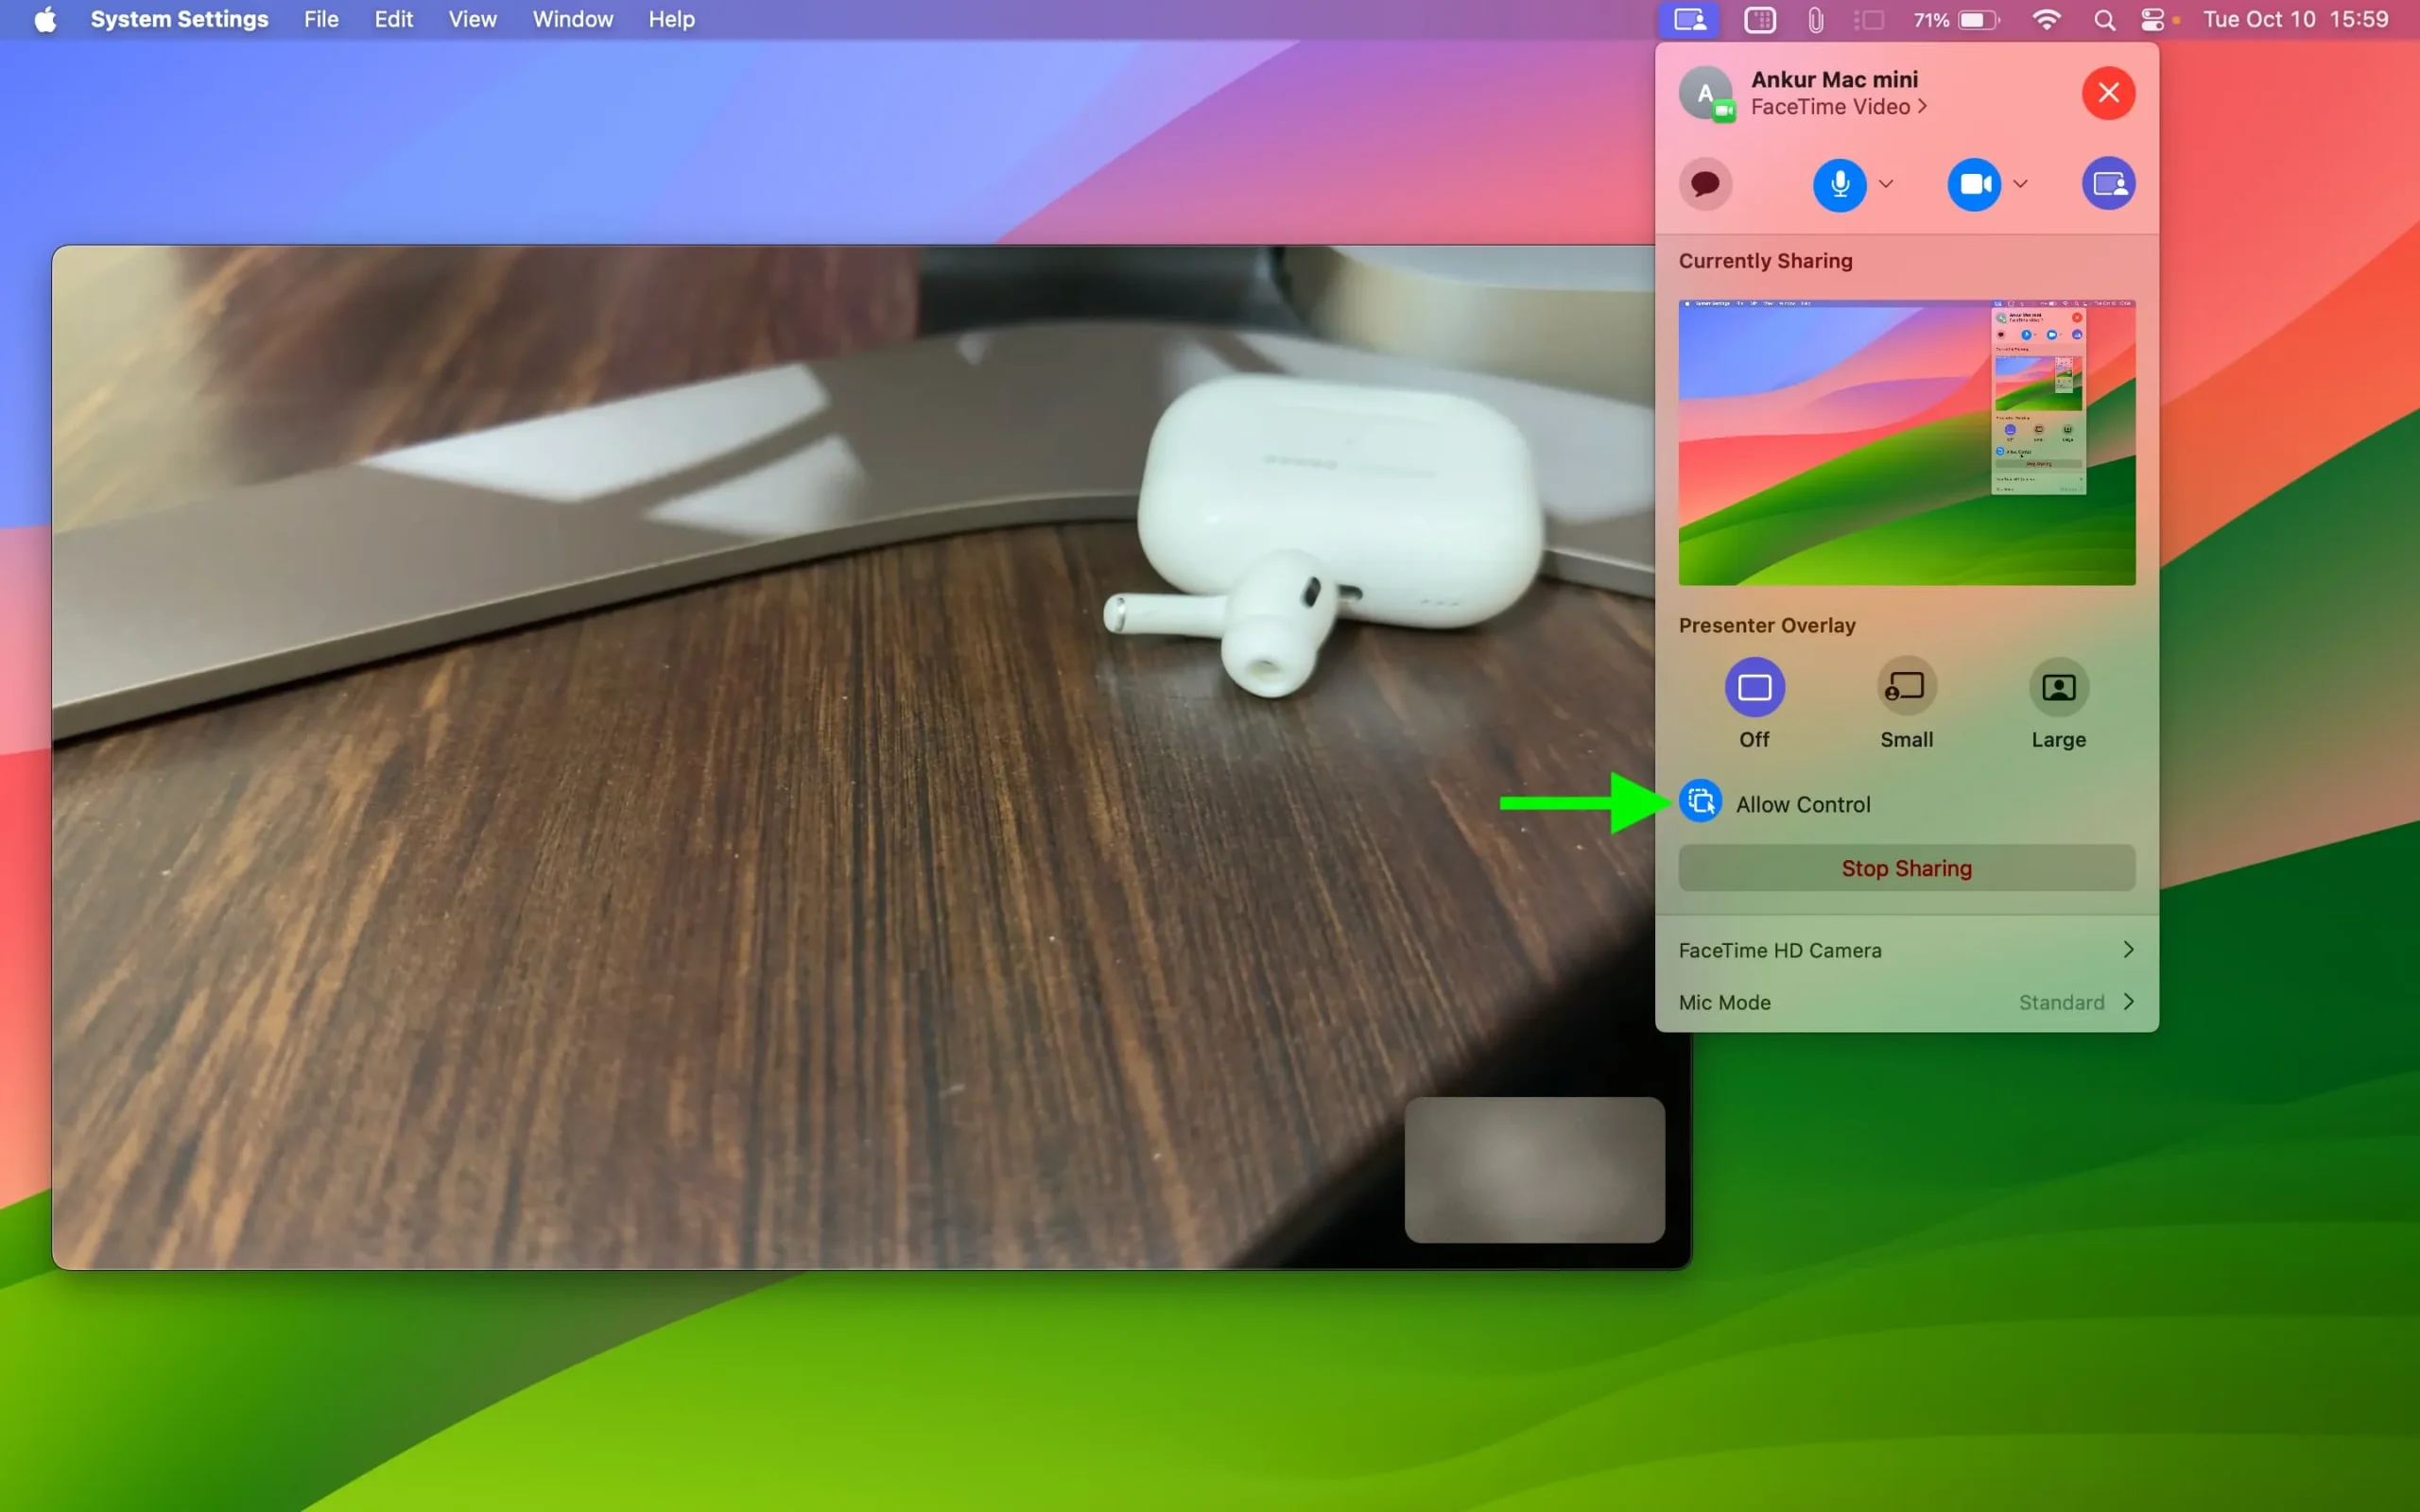
4) The person will notice that Allow Control option is already blue. Leave it as it is.
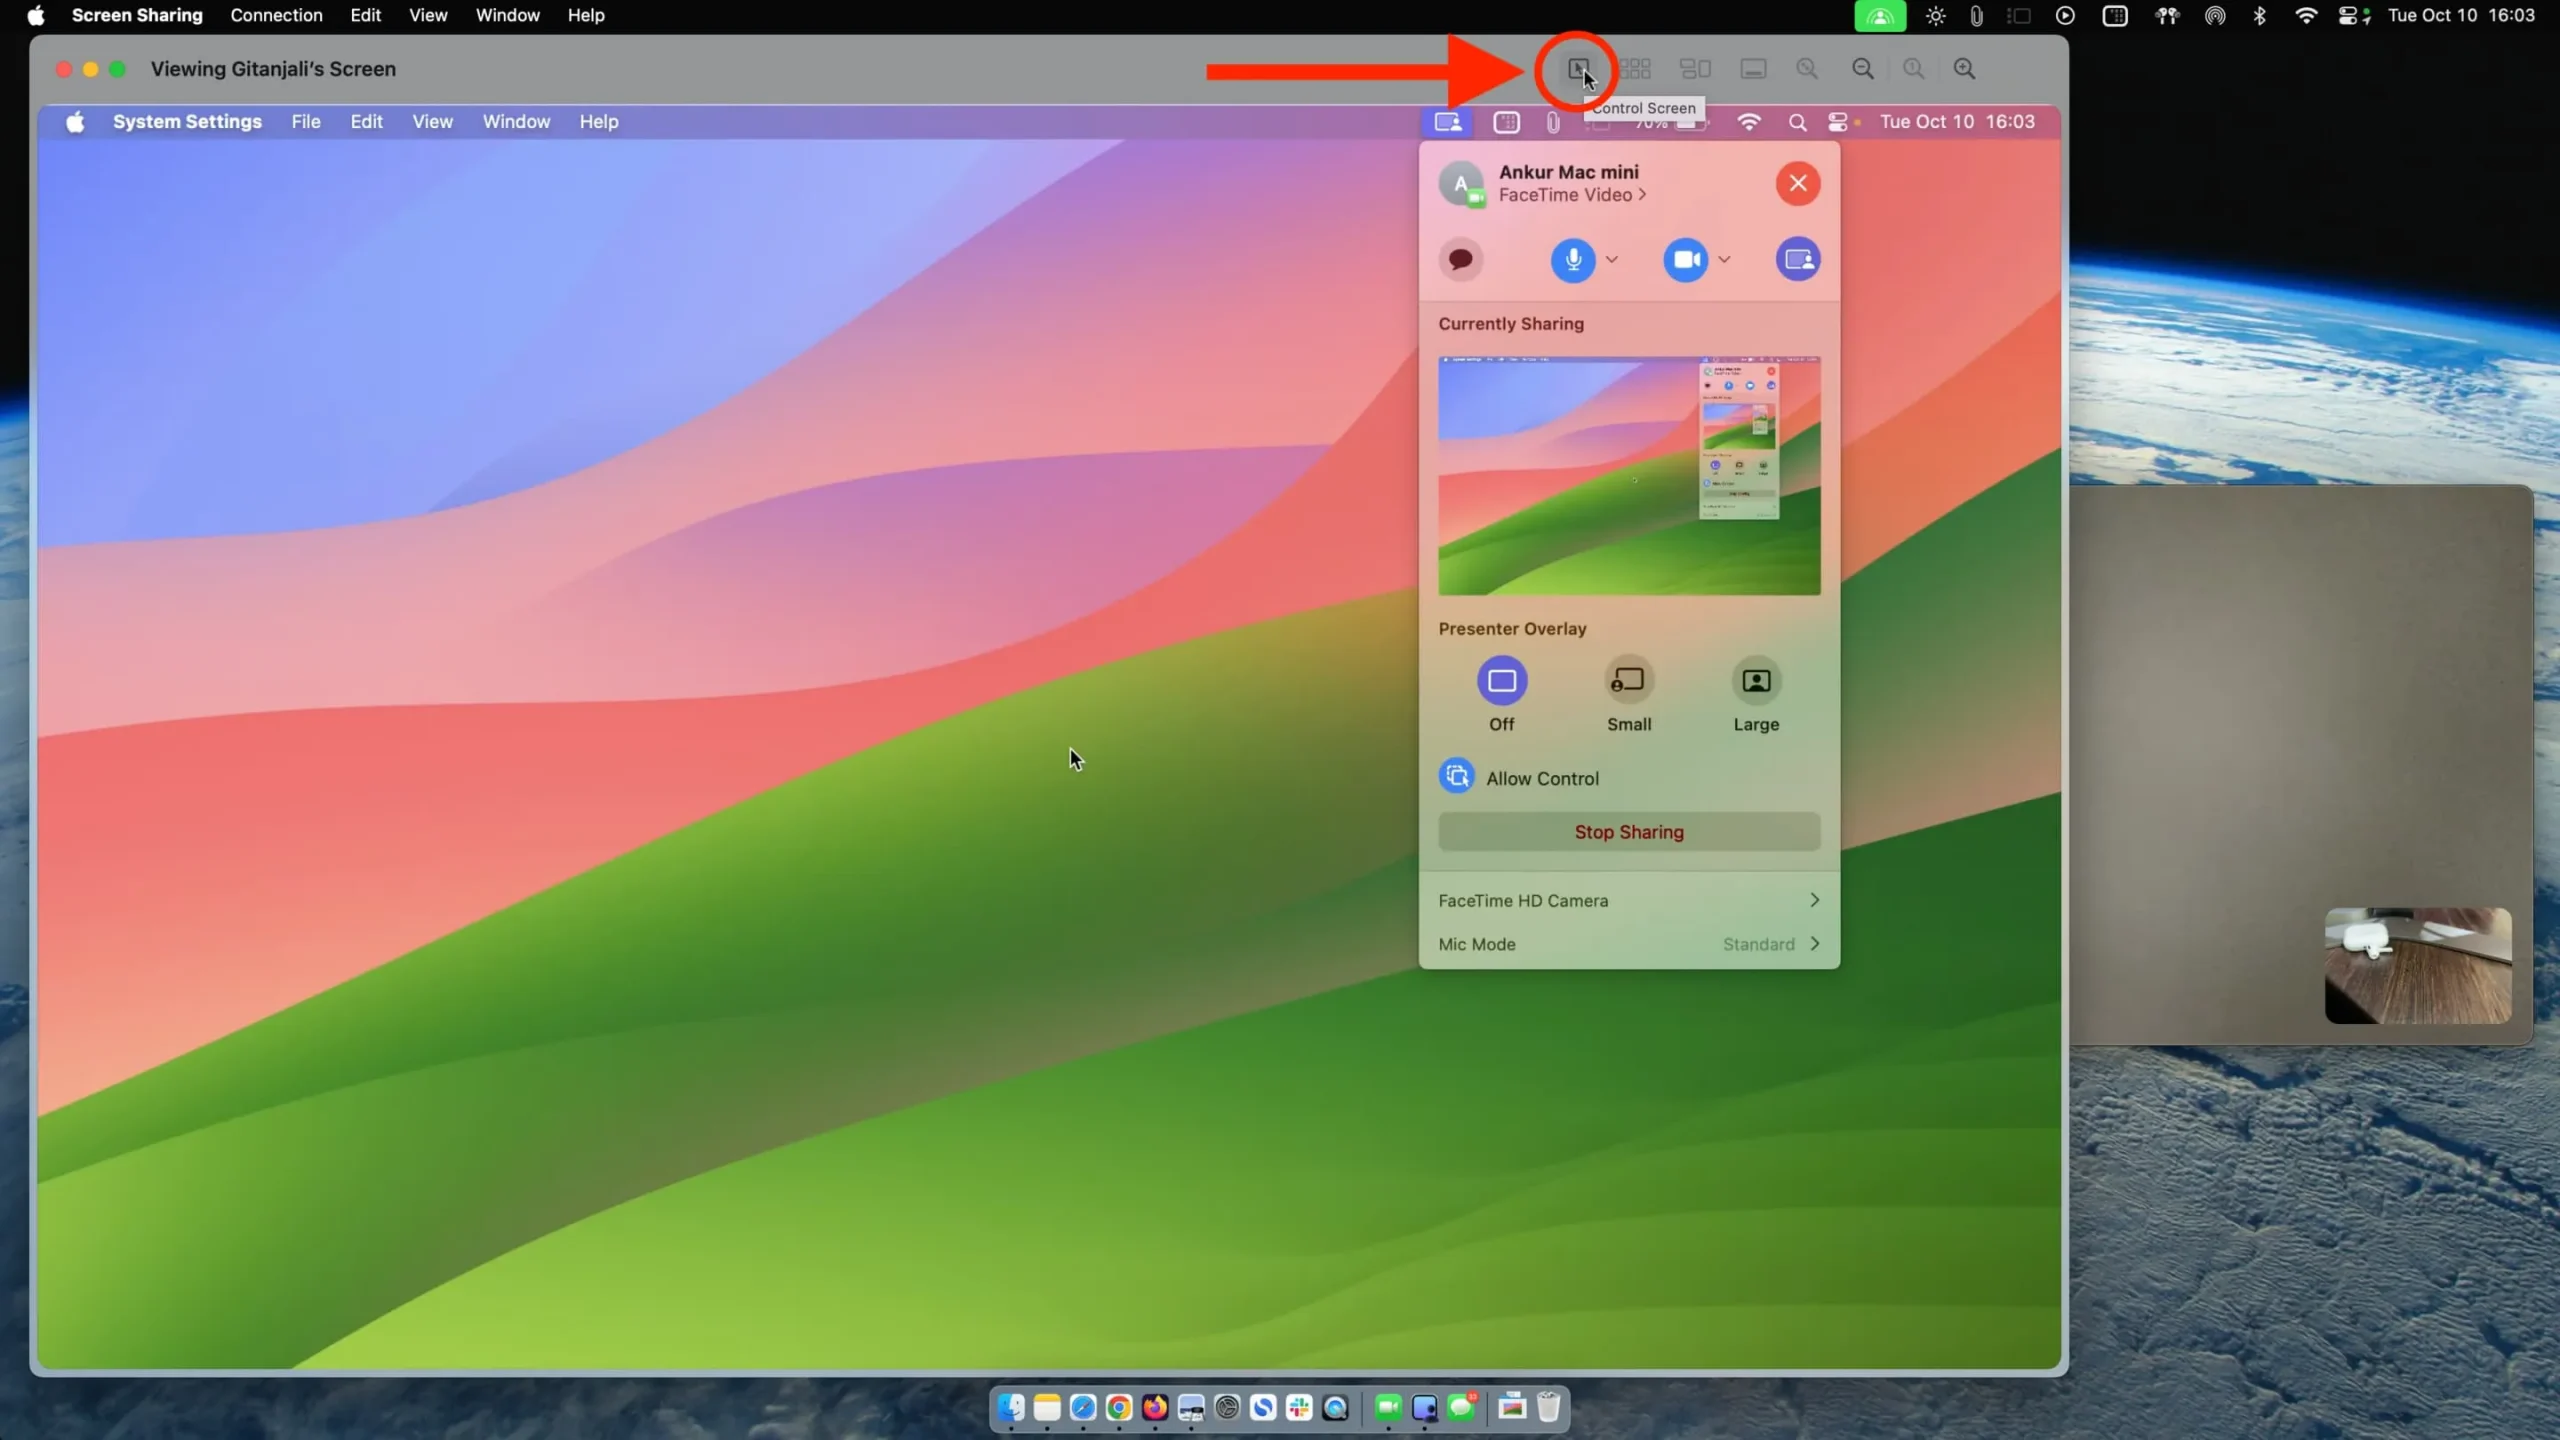
5) Now, you (the person on the other side who is helping and is already seeing that person’s Mac screen) should click the Control Screen button on your screen viewing window to request permission to control their Mac.
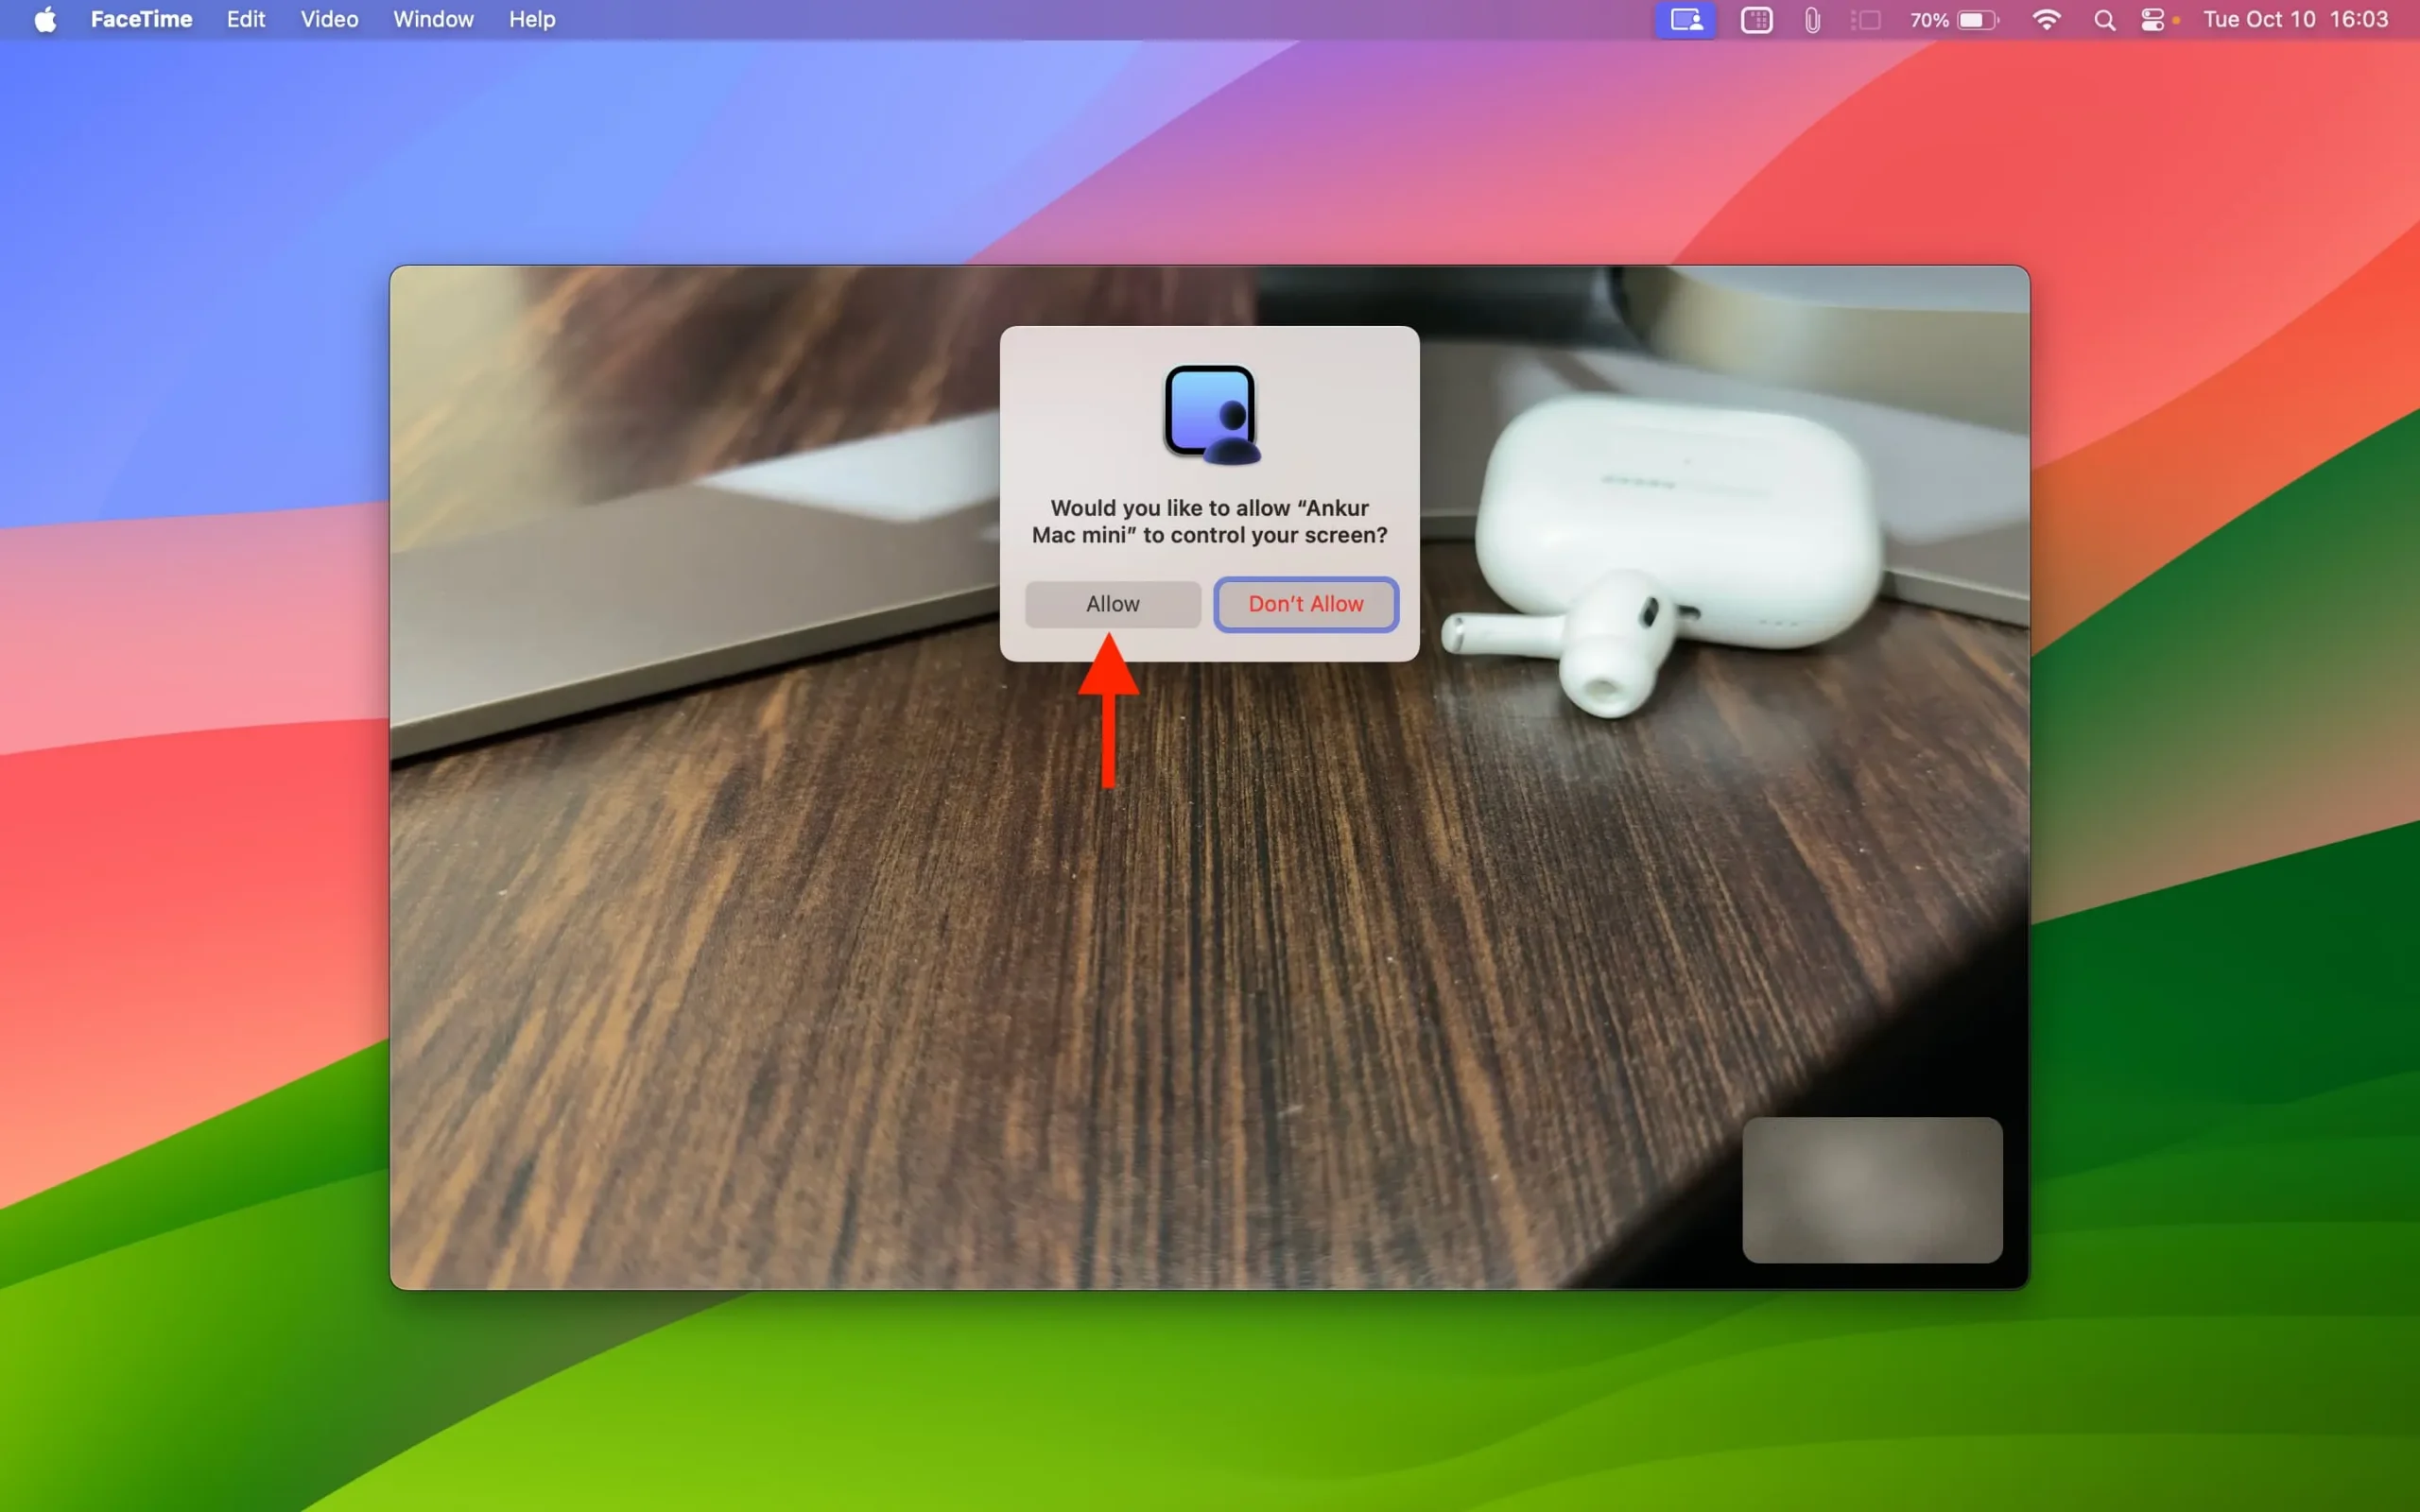
6) After this, the person whose Mac will be controlled will receive an alert saying, “Would you like to allow this person to control your screen?” . They must click Allow, and then you can remotely use their Mac apps, go inside folders, etc.
Stop Mac from being controlled remotely: Click the screen control button from the Mac’s top menu bar and click Allow Control so its icon turns from blue to gray.
3. Use the Screen Sharing app
Screen Sharing is yet another Apple app allowing you to remotely see and control another Mac. If you paid attention to the Dock on your Mac while following the above two methods, you’d have noticed that it’s actually the Screen Sharing app that’s handling all the screen-sharing requests even when they are initiated from Messages or FaceTime.
After the macOS Sonoma update, the Screen Sharing app lists people you previously connected to. You can edit the entries, put them into groups, or delete them.
Follow these steps to ask another person to share their screen with you so you can control it remotely:
1) Open the Screen Sharing app on your Mac. It will be inside the Other or Utilities folder in the Launchpad and the Applications folder.
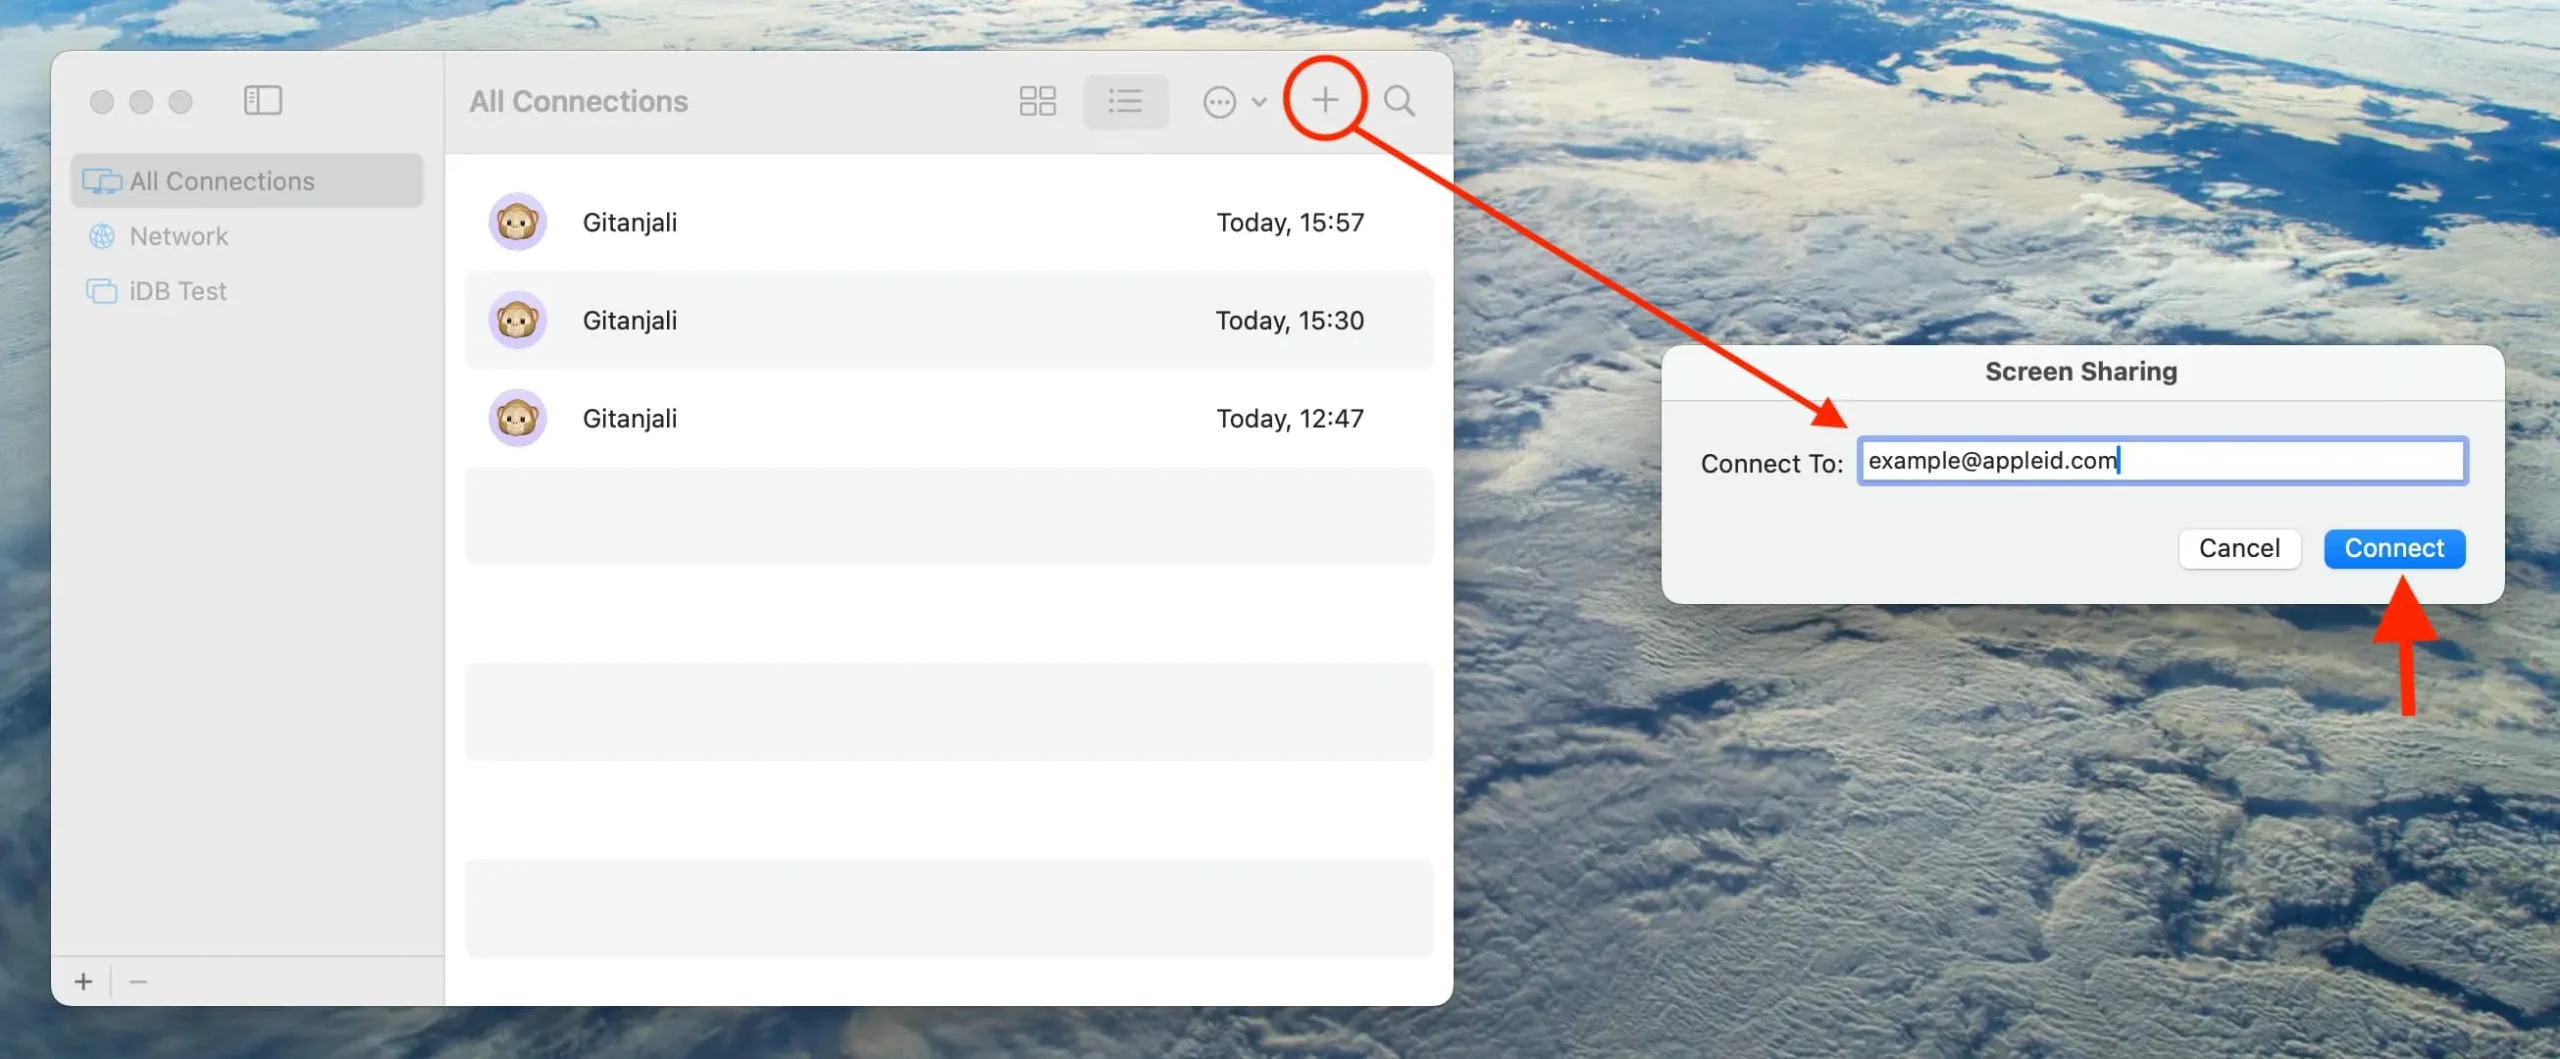
2) Click the plus button, enter that person’s Apple ID, and hit Connect.
3) That person will receive a notification. They should click Accept.
4) Now, they have to choose “Control my screen” or “Observe my screen” and hit Accept.

5) You can now control or see that person’s screen and help them.
To stop screen sharing: Click the purple screen control or screen sharing button from the menu bar and choose Pause Screen Sharing or End Screen Sharing.
